Hollow beads—transparent ones, anyway—look really, really bead with a line of bead release going through the middle, so I developed techniques for cleaning beads very early on. Holes full of release, or badly shaped holes, or even just dust on one's beads may not, in fact, look too awful on the typical bead; but photograph that sucker and blammo! even the smallest flaw suddenly looks huge (scroll down to that closeup). I happen to be the unofficial photographer for my local chapter, and it's my job to make everyone's beads look good. I can do a better job if they're properly prepared. And I have to say, I did not do a good job getting this point across for the 2004 postcard. So looking ahead to 2005...
Perhaps the picture below, of two beads only 8 or 10mm in diameter, will illustrate my point about photography magically magnifying stuff:) Quite apart from the complaints of whiny photographers, nothing marks a bead as a beginner effort (or cheap import) as quickly, to my mind, as bad holes, filled with release.
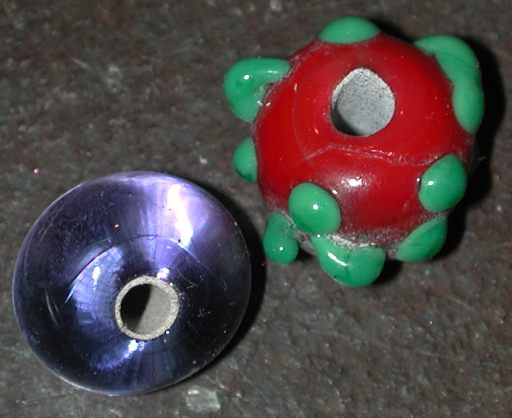
My child graciously consented to provide some “beginner beads” from her 2nd lesson for this tutorial.
However, just because this appeared obvious to me, doesn't mean it does to everyone else; and as my local glass bead chapter requires bead release be removed from beads entered in guild shows, I thought I'd attempt this little tutorial. And the good news is, with just a little time and effort, you can dramatically improve the look and quality of your beads. These tricks have certainly saved me a time or two.
clean_bead6806.jpg
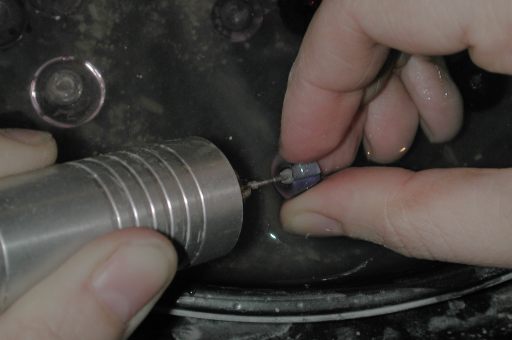
You can do a lot of the work just by the way you remove your beads from the mandrel—start by dunking your bead in water, soaking it for awhile if it's stuck fast. Then grip the mandrel at right angles with pliers while rotating the bead only.
clean_bead6810.jpg
Only after the bead rotates freely should you start moving it back and forth. As you slide the bead up and down the mandrel with one hand, rotate the mandrel with your other; the release, particularly “uncooked” release, will form a slurry with the water, which in 10 or 20 seconds will remove much if not all the release from the hole—especially if your dip was smooth and round.
clean_bead6823.jpg
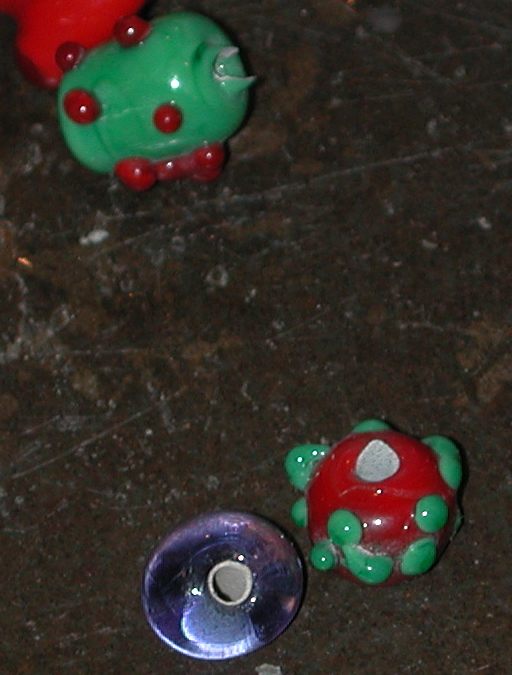
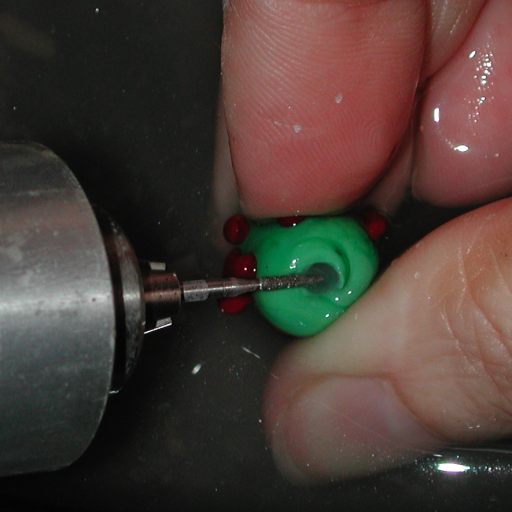
Not only release, but get a load of those stringcutters in the green bead. But, as you will see, with the proper tools, even this can be helped.
clean_bead6830.jpg
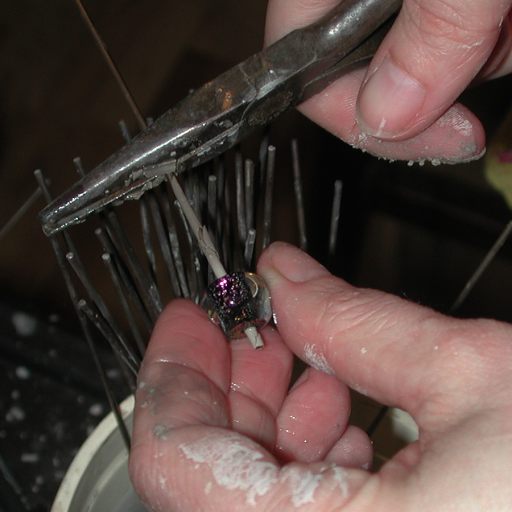
Start by removing the bead release. Here I'm using a diamond covered bit, under water. I beg these things from my dentist, and properly treated (i.e. kept wet) they last an amazingly long time. Keep the shaft of the bit parallel to the hole, running it along the (in)side of the hole. You should be able to see the release flooding into the water, or at least forming a slurry in the hole. If the latter happens, dip the bead deeper into the water, and then inspect it. Keep doing this till the release is gone. If the stuff coming out of the hole changes color, that's a good clue you've removed all the release and are starting to grind the glass. Unfortunately you typically only get this cue with opaque glass.
clean_bead6871.jpg
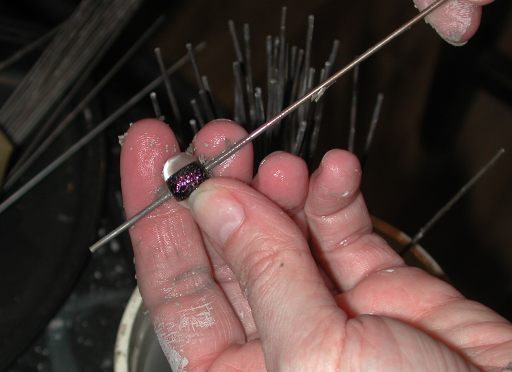
Now comes the fun part, dressing the hole. Cleaning the release can be done with a diamond coated reamer, but I haven't had much luck using hand tools to dress holes—not saying it can't be done, only that I'm too lazy to do it. Note that the tool perpendicular, rather than parallel, to the hole. Using only as much force as is needed, and working in small increments is a given with lampworking, and so too here. It's almost as if you're gently rubbing the tool across all those projections, just taking off a tiny bit at a time—try to do it all at once, and you'll just gouge the glass, the way roads get dips from washboard bumps. Circle round and round, taking a bit more off each time.

clean_bead6881.jpg
When you've got the hole flat, angle the tool just a bit, to chamfer the hole. —This technique is less noticeable with opaque than transparent glass, and in any case, you only want to dress as much as required to remove all the flaws—and no more. If you have to commit some major surgery (as, for example when one end of your bead comes free of the mandrel while you're making it) you may have to acid etch the final product to cover up your doctoring.
Now, doesn't that look much better?
updated formatting, 26apr14.
Unless otherwise noted, text, image and objects depicted therein copyright 1996--present sylvus tarn.