This is a classic pattern, with many variations. Perhaps the best known practitioner is Kristina Logan, who, sadly, doesn't make many beads featuring this approach any more. Beautiful as her beads are, though, there are many other fine interpretations; and though mine surely aren't the best or even in the top 50 percentile, I did promise my fellow glassact members I would publish a demo for folks who a) like dots, and b) don't have a clue about flowers and c) want to do florals.
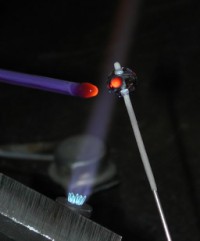
Start by making a base bead. I've made a hollow, out of lazyness, but solid beads are better.
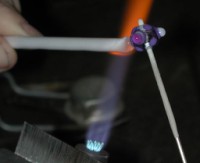
Choose a dark color for your base spots. I've chosen medium opaque cobalt blue but 064 black (dk transparent purple) is an excellent choice for reasons that will become clear (pardon the pun) later on; make several equally spaced dots, just big enough for you to fit three smaller dots in later. They will spread and get bigger; and the bigger they start out, the harder they'll be to neatly case later on.
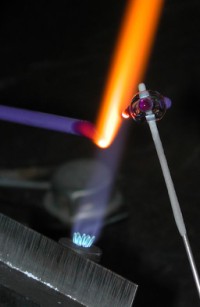
Next, put in some spacer dots between your big dots. Frankly the ones I'm making are really too large. For an excellent discussion on distortion effects, see Corina Tettinger's Passing the Flame.
Heat the tip of 204 white preparatory to spot casing the dark dots. Yup: putting a glob of glass on top of another spot is all there is to spot casing.
The idea is to almost cover the dark color, but not quite. If you've gotten the tip of that white rod good and runny, it will squish and spread nicely over the blue. Even if it doesn't, since white has a much lower viscosity, it usually spreads nicely.
Here you get a sense of how I flame cut the dots. Notice that white strikes transparent, which can make it difficult to see!
Here I'm melting in the white—not flat, just humped. Note that this and preceeding pictures were taken on my right side. The remainder were taken on my left side, and thus the angle changes.
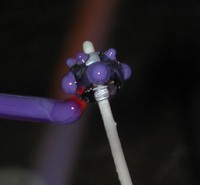
Next, put three equally sized (okay, as best you can) dark blue dots on the big dots. I start the “point” of my triangle on right edge of my white dot, in the middle; then stagger two dots top and bottom to the left. And yes, I use a full-sized rod. I find distributing the heat base over the larger mass easier than with a stringer, which I inevitably overheat and then glob on a big dot. This is strictly a matter of personal preference; use stringers if they work better for you.
Here you can see the dark dots a little more clearly. Melt them down before going to the next step, which is...
...to place white dots on top of the little blue dots. Try to center them as best you can, but err towards the center of your flower, which is going to get mashed anyway, when you twist.

Cutting off a white dot. That wooden thing is my arm rest, which is hinged, and positioned at about a 45 degree (or even steeper) angle here.
Next job is to melt the white dots in, most of the way. Optionally, you could spot case each white dot with a medium transparent.
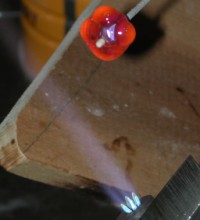
To prepare for twisting, heat a large spot.
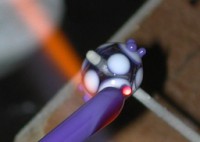
Pull the bead a bit out of the flame and insert a mandrel (in this case, a 1/16”).
Then, twist the mandrel. The mandrel will just pull the dots a little, so they're still nice and plump and petal-ly.

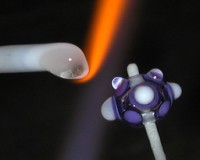
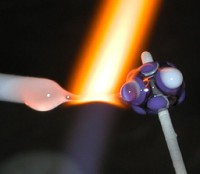
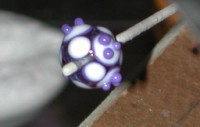
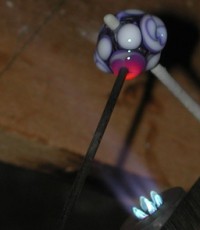
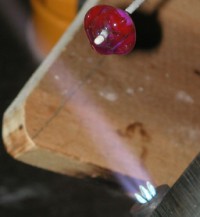
Spot case the small dots above the flowers; I used a pale blue violet, either 080 or 082 (alexandrite, as I recall). You really want to completely cover the opaques, or they'll creep out from under your transparent spot-casing.
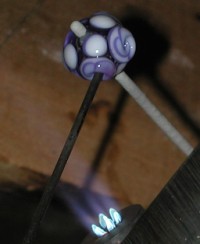
Then spot case the flowers themselves. You can either heat a big gob, as here, or just get the tip of your transparent really runny and sort of chase it around the perimeter of your floral dot, ending up in the center. This means less to melt in later.
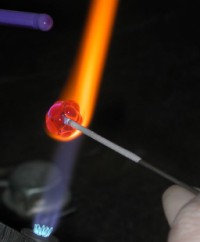
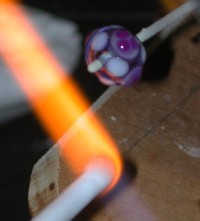
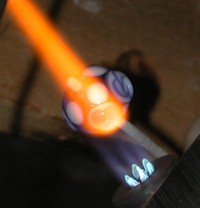
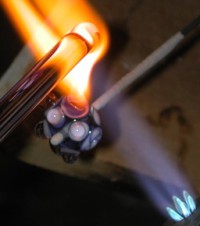
Now those big spot casings have to be melted down.
Don't heat the bead too much, or your design will sag and distort.
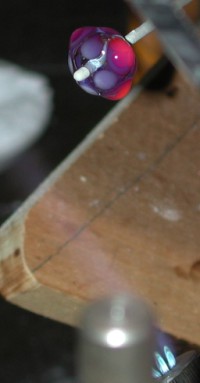
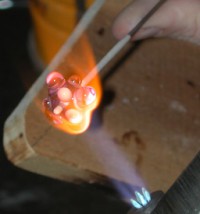
When I make hollow beads, I feel I'm doing really well, when I let in just enough heat to shape the bead without losing control of it. I'm not that good with these; I have to pull the bead out periodically, and let it cool.
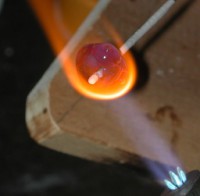
In fact, I did the heat, melt in, let cool thing three or four times, but I'll spare you the iterations: here I'm beginning to melt in again.
Earlier I mentioned black would be a good choice for the initial dots. This is because it is a transparent, which means it doesn't creep as much as the softer opaques do; that is, when you spot case, the casing, if it doesn't quite go to the edge, won't let the opaque surge and curl around the edges of your bead. This is also, I suspect, why Kristina Logan liked to use black or dark cobalt blue for her base bead: the transparent spot-case just blended right in.
But by now you're probably wondering, why bother with the initial dots at all? The answer is that they can act as spatial locators, and as physical and visual frames around your flowers; but they're not necessary. I saw almost exactly the same pattern but with the colors reversed: the beadmaker made a bright transparent bead; put large white spots; then spot-cased with the saturated transparent (red, as I recall); then put on three white dots for the flowers; plunged; and spot cased with the bright transparent. Very pretty and very effective.
You can make the flowers with four or five petals; you put two layers of petals on staggered; You can leave the petals on the surface of the bead and merely flatten them without melting them in; you can case all the petals at once, which means only the outer edges will be curved; you can rake them out, making them pointed, or crease them with a knife; the list of things goes on and on.
Have fun!
Unless otherwise noted, text, image and objects depicted therein copyright 1996--present sylvus tarn.