Anyone who's done a little research at all has probably already seen some instructions for mandrel wound hollow beads, a technique, according to Bandhu Scott Dunham, (1997) developed by Helga Siemel. I was taught the basic approach by Ona Sostakas, at the UM-Dearborn flameworking program, so I'm not breaking any ground, here. However, some of the written instructions I've seen have left out pointers I consider to be helpful; others have had really awful examples (glass wobbling all over the place, for example. Mind you, glass wobbling all over the place is fine—if you're trying to show how to recover from errors, and I'm certain when I get around to doing the oval/vase I'll have some excellent examples...but it's not the ideal to shoot for.)
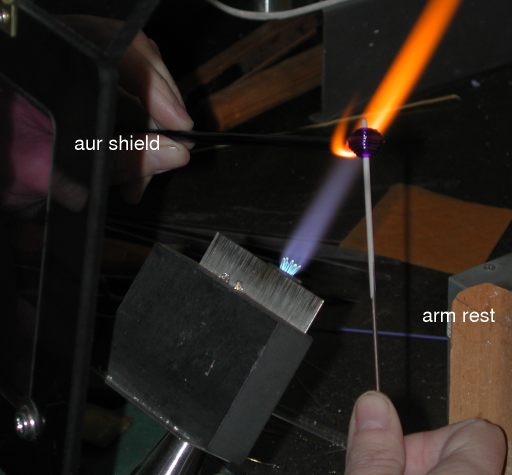
This picture gives a little better sense of my setup. Note the distance from my hand to the end of the mandrel, and the end of the rod.
Many precision beadmakers like working really tight, which, obviously, I don't. I use a shield instead of glasses; not shown is the left-hand arm rest, which is hinged and follows my arm movements. The right is wedged with a piece of wood, which I move to change the angle.
Click on the thumbnails below to see full-size (512 pixels) image.[1] p}N.b.: I've swapped out the 200 pixel wide thumbnails for 512 pix images. This has made the page slower loading, but the internet (for most people, anyway) has gotten significantly faster in the last decade or so.
2rounds5735.jpg
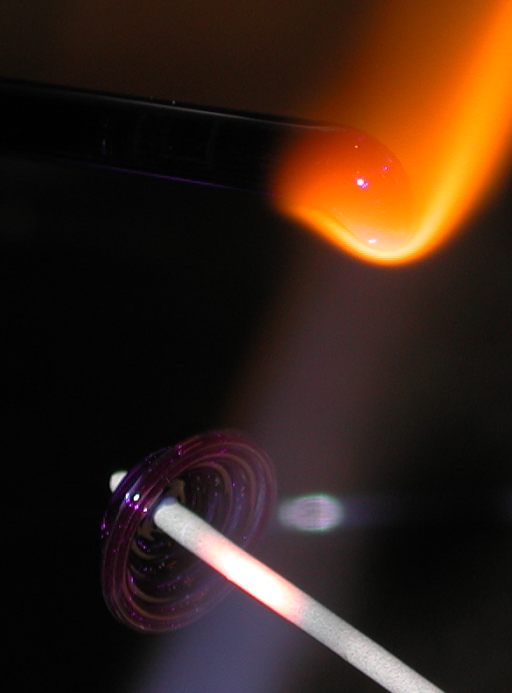
Start by warming up your bead release to glowing orange. Then put a wrap at right angles to your mandrel. This first wrap should go on hot (orange), so air cannot leak out between the glass and the release later.
2rounds5736.jpg
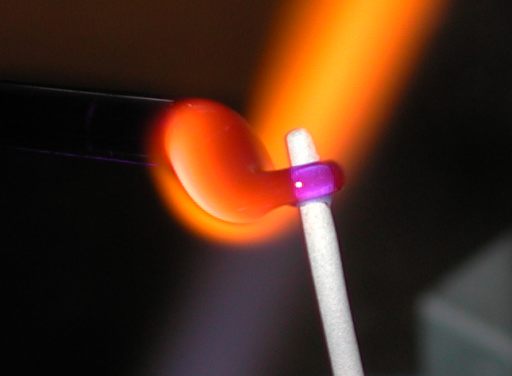
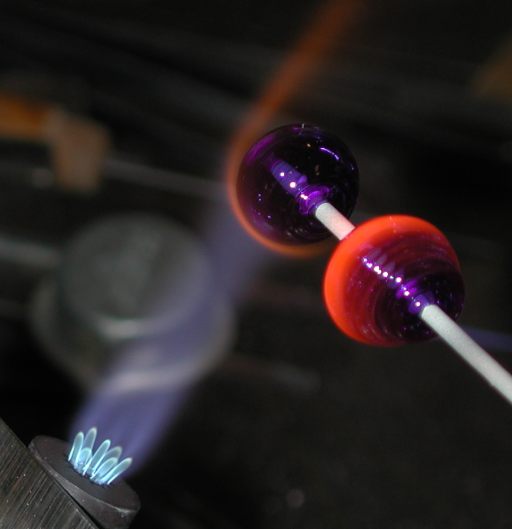
Note that the bead and mandrel are positioned beside the flame; it is the rod, providing the softened glass, that stays in the fire. Though nearly vertical in the photograph, in practice the rod is a little more angled from the my viewpoint.
2rounds5737.jpg
Continuing to wrap the glass. Note that the older wraps must be allowed to become stiff, or they will be pulled out of shape, causing a wobbly, out-of-round wind. Wobbly wraps are just as awkward and annoying as unbalanced tires, and for the same reasons. Avoid them if you can. If you hear crinkling, though, your glass is too cold. Don't worry about that right now, though—just keep it warm enough that big chunks don't fall off.
2rounds5738.jpg
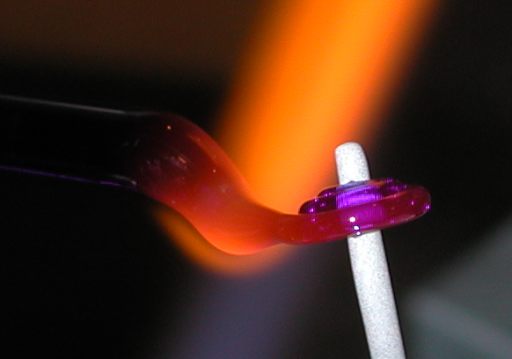
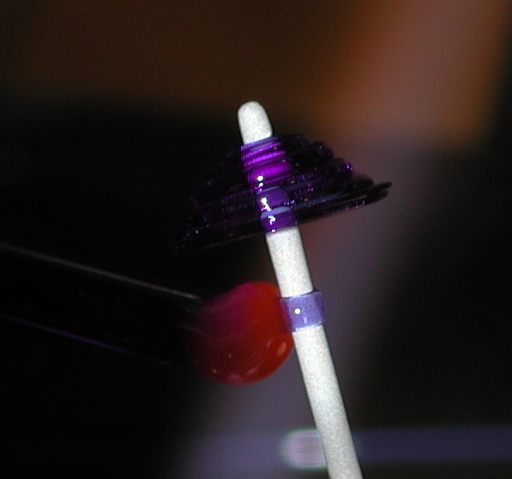
The first half of our bead is done. This mandrel, btw, is 1/16” 316 stainless with fusion products’ ‘flame-dri’ bead release on it, and the finished bead will be about 10mm in diameter. The rod is a typical Effetre cobalt blue, (even though it looks like a beautiful ink blue in the picture) a good color for beginners. Now I'm warming the bead release to start the second wrap. Keeping the rod warm is a production technique, so it will be ready to go—nice, but not critical for beginners.
2rounds5739.jpg
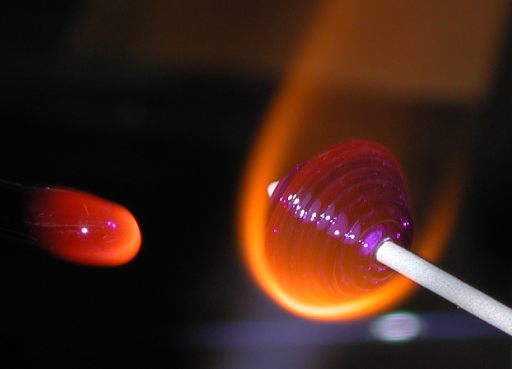
Though the glass looks cool in the picture, remember it needs to laid down initially orange-hot, to form a good bond; but then I'm allowing it to cool a bit so it won't get distorted as I lay down additional glass.
2rounds5741.jpg
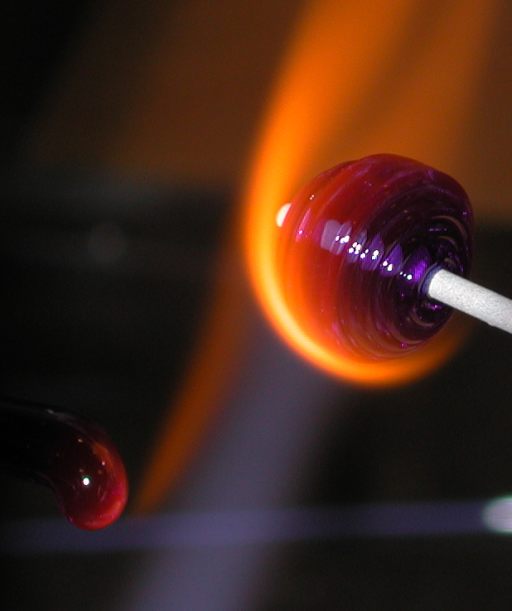
Strive to pull the glass off the rod in an easy, smooth motion, without jerks or ratcheting motions. This shot was taken to my right side and beside me. If you haven't already figured it out, yes, I'm left-handed.
2rounds5742.jpg
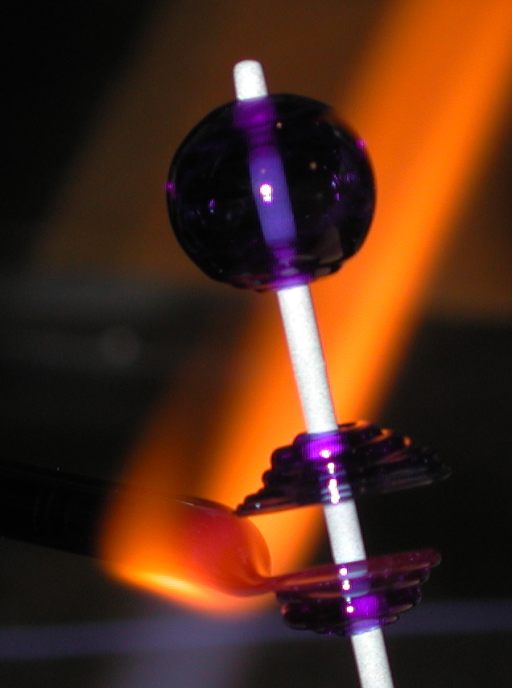
Nearly done. Earlier I mentioned that transparent cobalt blue is a good color for beginners. This is because the glass turns orange when hot, so it's relatively easy to gauge the temperature by color; it's also fairly easy to see pinholes and the like in the dark glass; and finally, because it's transparent it's easy to judge how much your bead puffed (or collapsed) when you're done. But, really the best glass is the one that for whatever reason (it's cheap! I don't care how much I waste practicing this stupid technique, or it's beautiful! I don't care how awful the beads are, the color's so pretty...) encourages you to practice.
2rounds5743.jpg
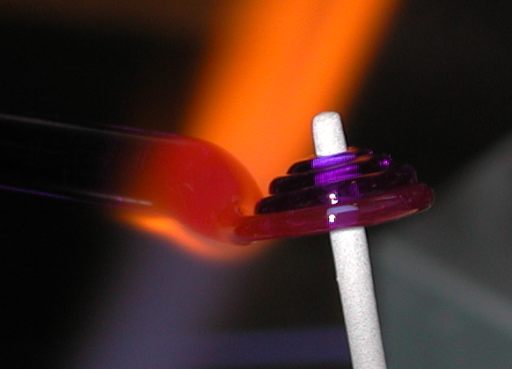
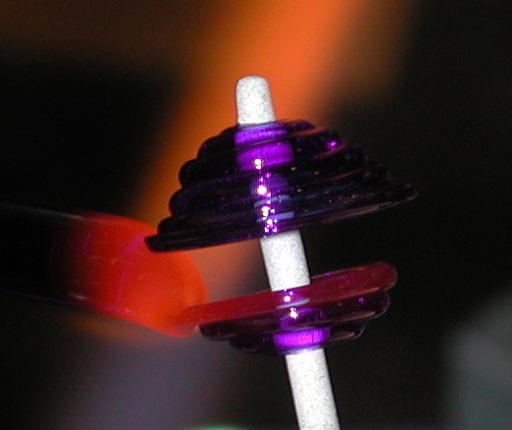
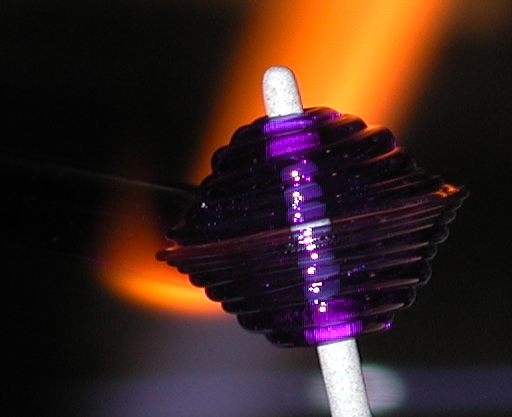
Particularly as I get to the very last wind, I tend to pull the the coils thinner, which I do (so far as I can tell) by rotating the bead faster. This avoids a lumpy seam around the equator of my bead.
2rounds5744.jpg
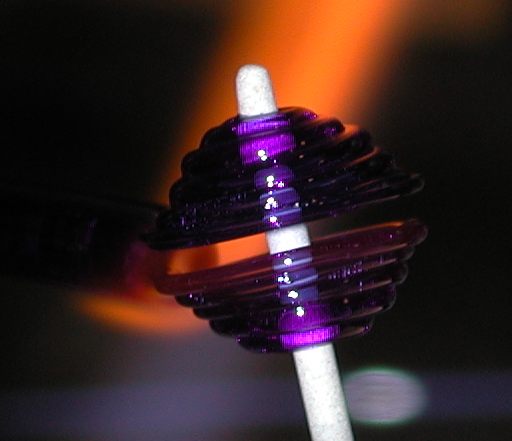
Next I preferentially heat the lips of the bead, alternating with a gentle roll on the marver. Beginners may prefer the greater control a hand-held marver gives them. I generally marver on top of the bead, in that case. Production bead makers will want to use the torch top marver, so they can keep the other hand free to hold the rod in the flame, as shown here.
2rounds5745.jpg
As with so many other things in life, less is more; or, put another way, you only use as much as you need to get the job done. Translated into glass terms, this means just as a big a flame, and just as forceful (and lengthy!) touch of the marver as is needed and no more. I might go back and forth between the marver and flame, gently sealing up holes and flattening the somewhat conical halves more to a sphere, several times—but all in the space of 15-20 seconds. This is one of the advantages of hollow beads—they're much faster to work. If you've been hearing ominous cracking sounds, though, execute this whole-bead warm slowly, to give cracks and cold-sealed coils a chance to warm and (amazingly enough) heal up. For thicker beads, you can rub the (handheld) marver back and forth in a sort of zig-zagging stitching motion to push the lips of your bead halves together. Once you are certain you've closed all the holes, heat the entire bead to puff it; you can hold it up to eye level to check that it's on-center, holding any high spots at the top of the mandrel so they sag (we all hope) into roundness. Often, I can just use gravity and a little patience to get a bead nicely shaped—no marver required. (This is the shot that didn't make it into the camera.) I personally prefer not to melt out the coils completely around the holes, because I like they way they look.
2rounds5754.jpg
There were a bunch of fuzzy photos, so you're mercifully spared much the lather, rinse and repeat. Beginners may want to stop here. For the more adventurous, hey, you've got the slow step—getting the rod molten—done, so you may as well take advantage and put another bead on, right? However, after you've made the first half of your second bead, spend a few seconds twirling the first in the heat—usually one complete rotation will do the trick. Then warm up your first half of your second bead—it's a little fragile, till those coils get melted in. If in doubt, warm the first bead and then the first half the second bead in an alternating pattern a couple of times, to make them good and happy before starting on the second half of bead no. 2, as shown here.
2rounds5758.jpg
As soon as you get the second half of bead 2 done, go back and immediately warm bead one, as shown. (One or two rotations. That's all it takes. Really.) Now go back and right away, start putting bead no 2 together. As you get to the point where you're sealing and shaping, it's probably time to warm bead no. 1 again. Now do your whole bead heat, puff, hold up to eye level while rotating to gravity shape, and you're done.
Now you have two beads ready for simple decorations. In the interests of keeping load times from becoming truly gargantuan, I've put the second part, applying surface decorations (dots, in this case) on another page.
Some cautions: flameworking is dangerous. You will get burned. I'm presuming you already know and have set up your studio with regard to safety issues (of which there are many) and know basic technique. (If not, for goodness sake, go research it!) The information on this page (indeed on the whole site) is offered “as is”, without warranty of any kind. This particular part (the “how-tos”) of the site is licensed under the Creative Commons commercial, derivative, share-alike license and the link will give you the complete legal information. The good news is that you may download, print, share and even sell the how-to pages to your heart's content, as long as you a) attribute it and b) include the same same license on any work that incorporates this one.
[1]N.b.: I've swapped out the 200 pixel wide thumbnails for 512 pix images. This has made the page slower loading, but the internet (for most people, anyway) has gotten significantly faster in the last decade or so. Unfortunately, there do not seem to 100% crop sized images. Sorry.
Unless otherwise noted, text, image and objects depicted therein copyright 1996--present sylvus tarn.