You will need the following materials: eggs, vinegar, dye, wax (beeswax is traditional), wax stylus, candle, tissues or rags for wiping, old pot or pan. Not absolutely necessary but very helpful is one of those metal dippers for transferring the eggs in and out of the dye (usually enclosed with egg dying kits), and something to store dying eggs on. The something should touch the eggs as little as possible. If you use a kit, the box is usually designed with cut-outs to serve this function.
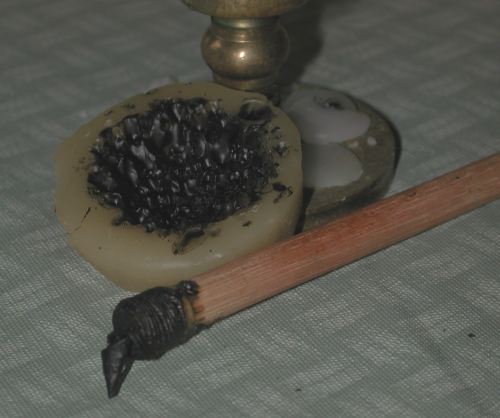
traditional stylus, cake of beeswax, and candle(stick)
I can't think of any reason off hand (besides the mess if it cracks) why raw eggs couldn't be used; but as it happens I like hard boiled eggs, and they travel better. There are many ways to make hardboiled eggs. My favorite recipe is bring eggs to room temperature; place in large pot; fill with cold water; bring to full rolling boil for 1 minute; cover and let eggs sit 25 minutes; drain hot water; rinse in cold water.
Prepare dye according to package directions. Eggs may be brought to room temperature if desired. Put each color of dye in its own container. Individual yogurt (8oz) cups are ideal; margerine containers also work well.
I tried wiping eggs with vinegar to clean any oils from them and to etch them. I don't think it etched ’em nearly enough. Next year I plan to submerge them in vinegar.
Either wash hands to remove excess skin oils, or use a tissue to hold egg. Light candle; heat stylus in falme; press into wax. The stylus consists of a conical metal tip with a small (~1mm) hole; the wax is drawn up into the cone, which acts as a resevoir. Keeping tip of stylus perpendicular to surface of egg, draw design. Lines work well; dots don't. You will quickly get into a rhythm of heat, dip, draw. Sometimes I find the wax hardens before I get it all onto the egg; then I just heat and use.
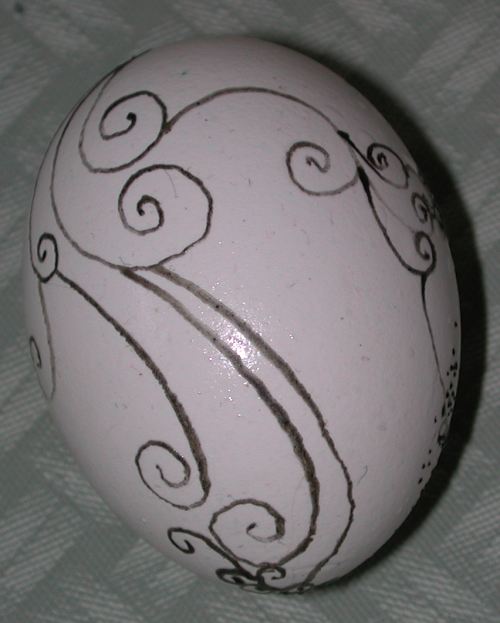
First Stage of Wax Application. Note condensation.
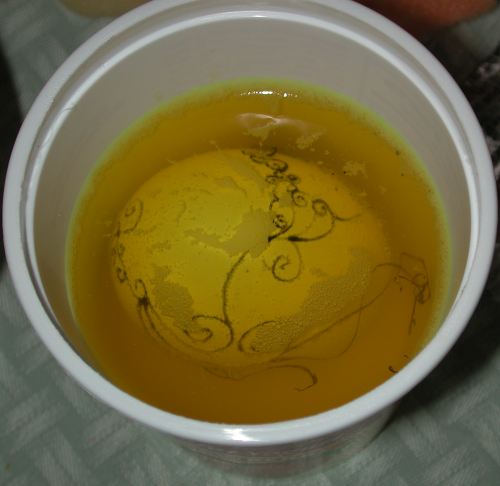
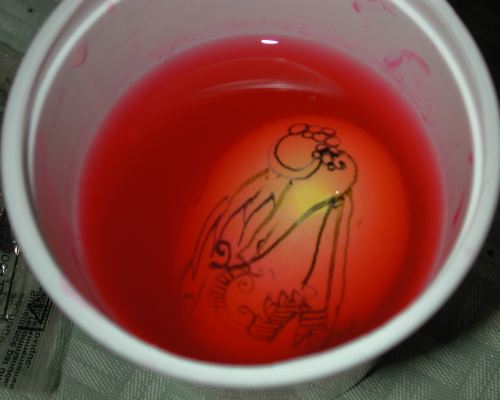
When you have a basic design, dip egg in first color–traditionally, yellow. It should yield white lines on a yellow egg, but it seems to me that often the yellow dye creeps under the wax, though this ceases to be a problem with later dippings, as far as I can tell. After it's soaked awhile in yellow dye, fish egg out, and let it dry. Then draw some more designs on it, dip it in a darker color, let it sit, fish it out, let it dry...lather, rinse and repeat.
I usually use the following color sequences: yellow/green/blue/[violet] or yellow/[orange]/red/[violet]. This year I noticed my younger kid doing things like going with fuscia/green combos, and I think such oddball combinations have potential, but the risk of muddy colors is much greater; I was unable to duplicate her effects. I also noticed that similar colors fail to show designs (e.g. fuscia pink over orange).
If the eggs are cold when you start they will sweat; that is, water will condense in tiny droplets on the surface as you work. (I suspect this has something to do with the pores of the shell acting as incubators; but the point is the drops will be small.) I rather enjoy this effect, but if you don't want light spots on your eggs, make certain they're room temperature before you start.
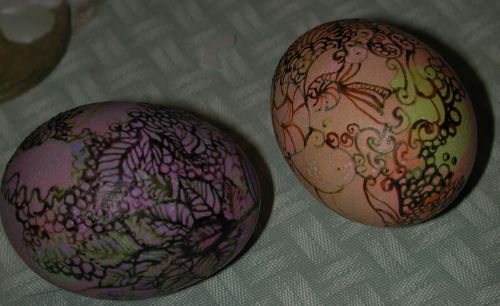
Wax is ready to be removed from eggs.
After you've finished putting on all the designs and dye on the eggs, allow them to dry thoroughly. You then have two options for removing the wax: you can either heat in a candle flame and wipe it off (I believe some tradtional pysanky artists use this method instead of the lighter fluid technique, but I couldn't swear to it) or dip the egg, a bit at a time, in water that has just finished boiling.
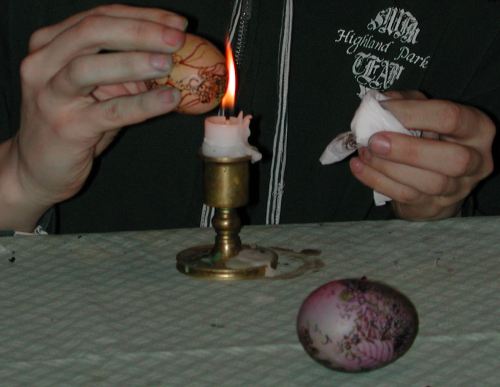
Melting wax off egg with candle flame.
The candle technique tends to leave residues of black soot on the egg, so I prefer to use the boiling water method, even though it leaches a lot of the color from the egg. In the picture I'm just holding the egg in my fingers, but this can result in hard-boiled fingers so I don't at all recommend it; use the dipper to lower your egg into the hot water instead. In either method, after heating a portion of the wax to liquid, wipe quickly with a tissue or rag to remove. Move to an adjacent section of egg, and repeat, continuing till all wax is removed.
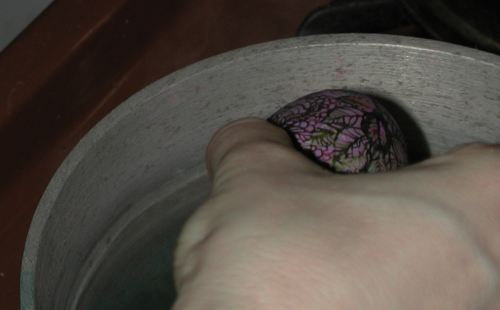
Dipping egg in hot water to remove wax.
Use a junk pot for this, because wax will stick to the sides. Do you really want carboniferous beeswax flavoring in your food? Thought not.
Unless otherwise noted, text, image and objects depicted therein copyright 1996--present sylvus tarn.