These are my reminder notes to myself for helpful tips and tricks for making the conpaito bag from Kumiko Sudo's Omiyage. They are not meant to replace the book! Frankly, even with the book, they're more likely to be confusing than helpful; but there are, at least, some pix of various bags in process, the main reason for making this page public.[1]
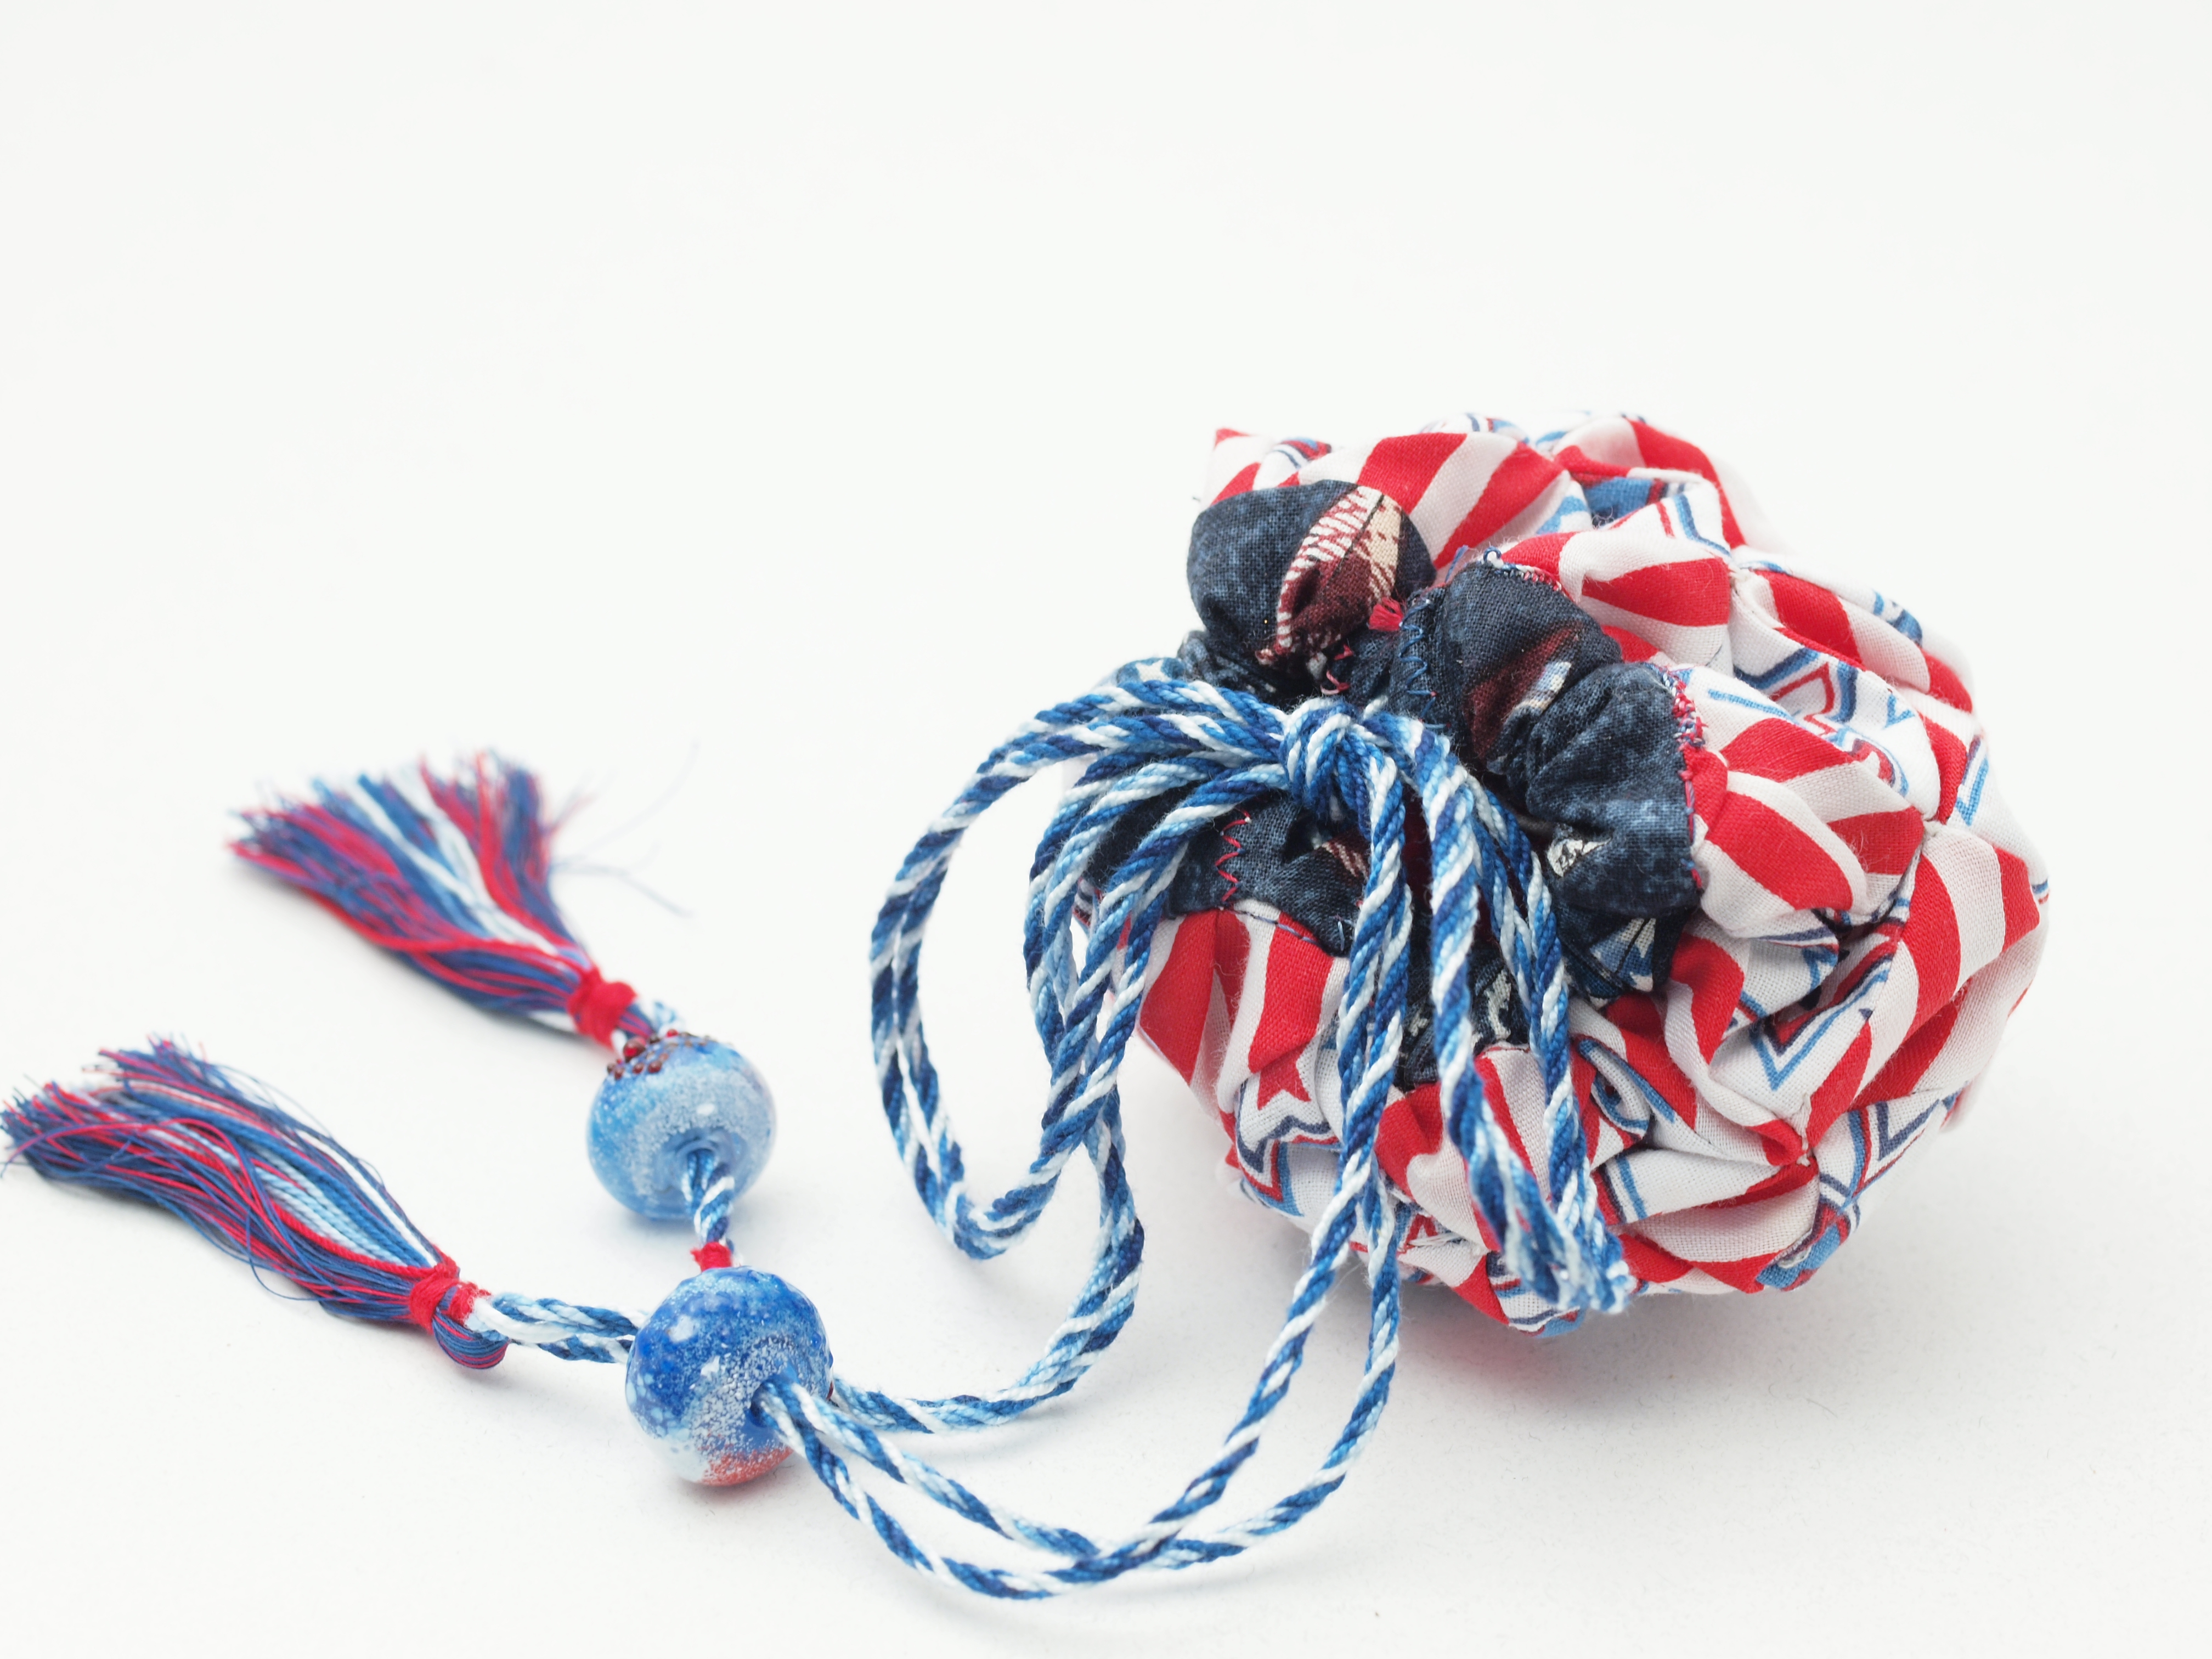
Completed bag. Note. I cut casing (& mebbe lining) to match exterior. Newer examples are ‘eased’.
pieces needed:
up to 4 colors of fabric can be used: Fabric A, B, lip/casing/lining
- 3 2x18" strips, color A
- 2 2x18" strips, color B
- 1 ?x3.25 strip, to cut 9 ‘house shaped’ pieces for the top (color B)
- 2 1.5x7" strips, casing/lip color (or 2x7, for thicker cords)
- 1 4x15.5" strip for lining (this is opportunity to use larger repeat)
The ‘house’ shape requires more fabric, so color A requires less. The casing lip color can be the same as color B (‘house’) to disappear in design, or Color A to contrast but still be bi-colored design, or ‘poison’ accent—since only about a quarter inch shows, choose fine repeat. The lining, on the other hand, is the opportunity for a larger repeat, or a rich fabric (surprise) when recipient opens the bag.
N.b.! The casing fabric is about an inch shorter than lining: lining must be tucked. (Do this by basting top edge and pulling till lengths match.)
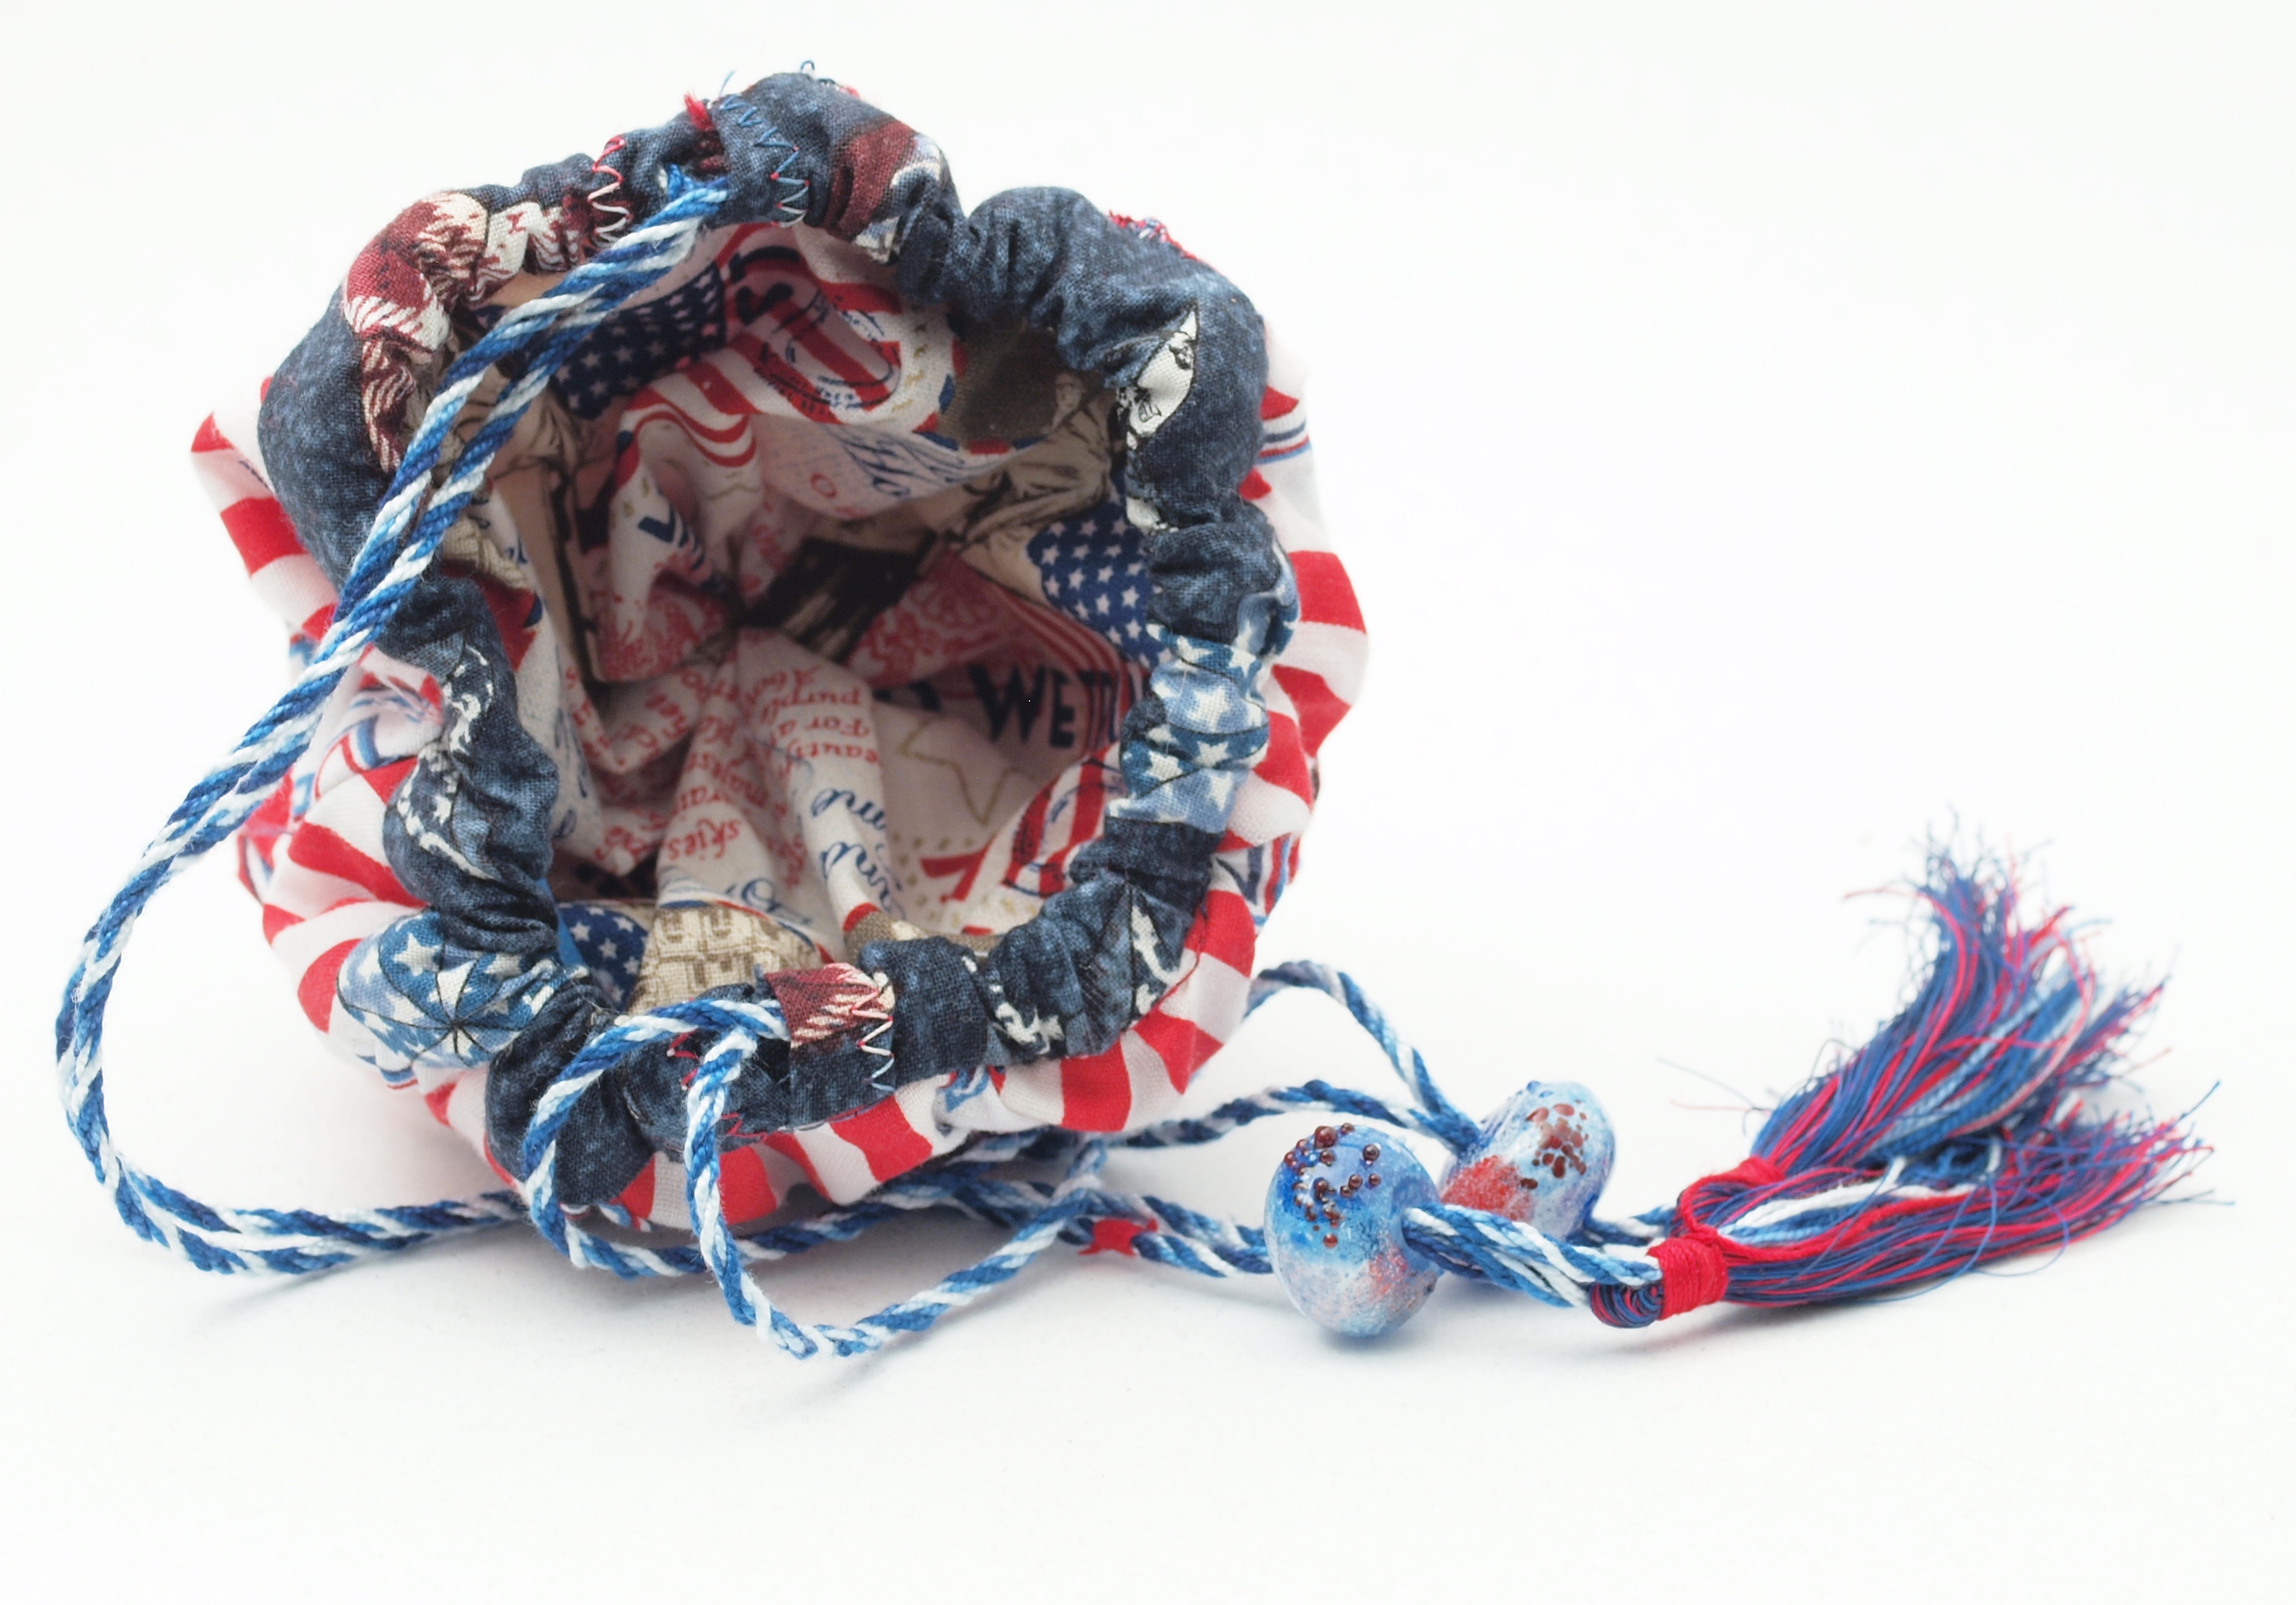
bag open, showing lining. Used a mirror to bounce light inside.
Hints for cutting:
- iron yardage flat
- Fold fabric 36" or longer in half, right sides in, so it fits within markings on mat
- align grain using markings on mat
- square up edge, removing uneven fabric, raveling etc.
- ‘working or live’ edge should now line up with 1" marking.
- Vertical alignment is easier to cut, ergonomically, than horizontal
- using markings on mat, cut strips 2", 3.25 (‘house’ pentagons), 4" (at least 15.5" long) & 1.5"[2] (at least 14" long)
To make ‘house’ shape.
The bottom is 3", the sides 1" the angled sides 2", which meet at 90deg.
Double 3.25 wide strip over, right sides together, so cut ends align on right. Using 2" wide transparent ruler, mark back of fabric at 1" along right (3.25") edge. Align dot with 45 degree angle marking on mat Place 2" ruler on fabric, aligning it with 45 deg marking Mark 2" long segment from dot on fabric Using cross (2" wide/long) marking in ruler, position it to make another segment at right angles Mark another 2" segment. Continue in zigzag fashion until 10 ‘house roofs’ are marked (6? 2" segments) There should be a zigzag along center of strip. Mark 1" verticals (sides of ‘house’) if desired. Carefully cut with rotary cutter.
- Cut 3.25" wide strip
- Cut 45 deg triangles.
- Stack
- cut off tips, leaving 2" on angled sides.
This will actually produce 10 pieces—1 extra. Using ruler method is faster and easier—and more accurate!—than attempting template, as instructed in book, and given that author is a quilter, is almost certainly the method she originally used.
Sewing pieces with machine.

sewing and ironing strips of alternating colors.
- right sides together sew 1 2x18"+ color A and 1 2x18"+ color B
- Use 1/4" seam. N.b.: this lines up with inside tip of foot–not outside edge!
- Or, use 3/8" seam, which does line up with outside edge of foot—but be consistent!
- use 3mm stitch length
- If strips are 36" (or longer) slice in half.
- Continue stitching 2" wide strips, alternating colors A and B, until 5 strips sewn: ABABA
seams ironed; ready to be cut crosswise and stitched into checkerboards. This example is made with 1/4" wide seams.
- IRON!
- Do this by finger pressing each seam open.
- Then, iron seams open, working from outside to inside seams.
- Point of iron is less helpful than it might appear
- Easing iron along at angle seems to work best.
- Careful cutting, even seams and ironing will cause squares to align better!
- Align ironed strip (should be roughly 8" (10" less seam allowances) x 18+ on cutting mat markings
- Slice two inch strips crosswise
- Cutting vertically is easier
- Stack, right side up: if fabric pattern is large and complicated, keep them in order! (And right side up if necessary)
- Position strip horizontally, ‘top’ (if fabric has nap) to the right.
- Right side down, align ‘point’ of house with lower right hand corner of strip
- Sew right edge (see book for clarifying picture)
- Sew next eight ‘houses’ to next 8 strips, ganging them together
- cut apart
- Finger press new seams open
- Using book, align strips, staggering them as shown:
- Start at bottom
- Align seams
- Sew towards ‘house’
- Mark edge of seam with pencil
- Pivot, needle down, at mark; sew ‘sides’ of house pieces together
- Sew most of the way up (to 1/4" mark); backstitch.
- Trim top edge as needed
- Sew bottom squares, edge to edge, following directions.
- This is difficult to get those nine points to meet!
- After last one, then sew seam to make pieced fabric into a tube
- Next, see book for which points to stitch together to give folds/texture; to move from one set to the next, pickstitch along seam (which reinforces); lock with tinystitches to prevent unwanted pulling!
- Add a 6/0 or 8/0 seed bead for decoration at intersections
- Use small sharp needle and thin, strong thread; also pliers/thimble.
adding ‘house’
Lining
- Cut out lining
- Using longest stitch, sew basting lines 1/4" away from long edges of fabric
- Right sides together, sew short edges to make cylinder/tube
- Using basting threads, gently pull bottom edge till tight. Reinforce with several stitches made with heavy thread
- Iron/pin tucks into quilted fabric.
- Pull on upper basting thread to reduce edge so it matches exterior of bag
Attaching the Casing.
This can be done in one step or two. Two is easier. For two:
- Prepare the casing pieces (qty 2):
- Turn short edges in 1/4" and iron
- Fold over long edges of casing pieces 1/4" and iron
- Wrong sides together, sew top edge of lining and exterior, 1/4" seam
- Right sides together, align unfolded edge of casing with top edge of bag.
- Stitch below (e.g. 3/8" seam) prior seam
- Fold over and blind stitch into place (to bag lining) covering raw edges.
- Thread 2 cords, roughly 29" each, knotting ends.

Bottom of bag. The striped fabric making up the ‘squares’ in the checkerboard were actually cut on the bias, resulting in them being vertical in the final construction:)
page created 28mar2013.
Unless otherwise noted, text, image and objects depicted therein copyright 1996--present sylvus tarn.