How to put together a craft hut style canopy. You will need:
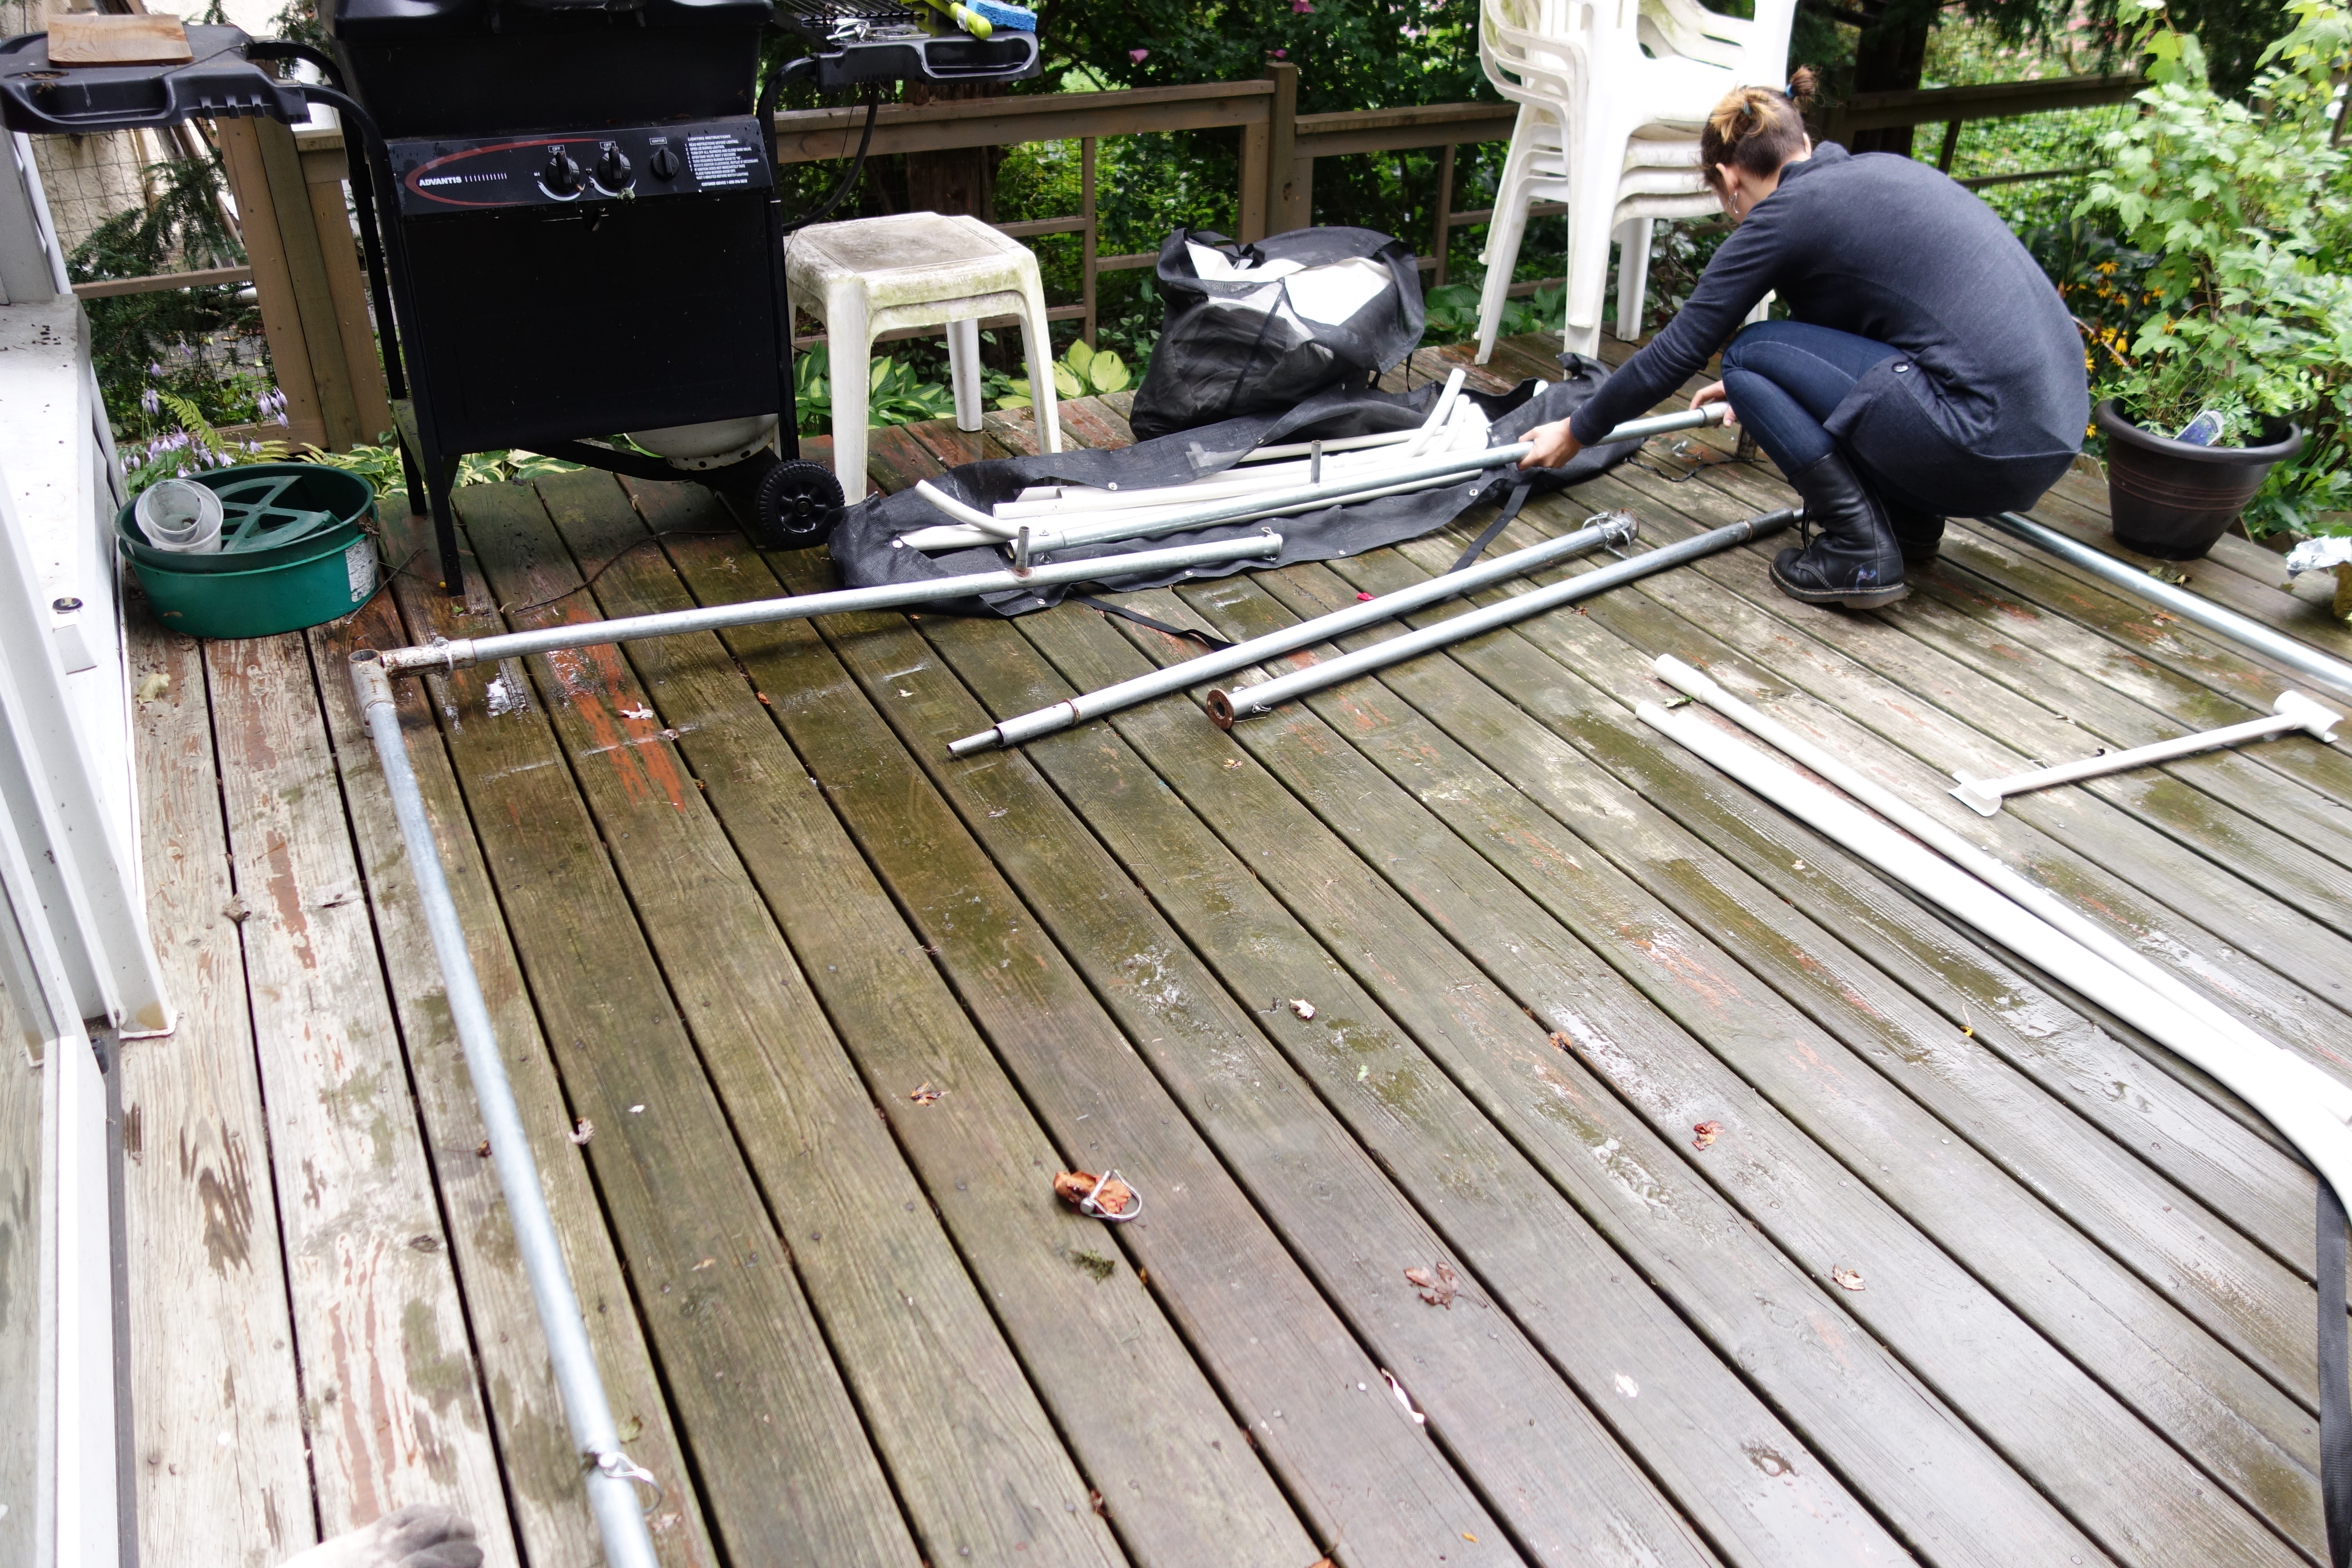
laying out pieces. Note that corners and front/back are clipped together, side is being done last.
- 3 bags—2 long with poles, one square with sides and top
- 4 ropes with clips (to hang weights)
- 4 pvc weights with eyes
- wrench for butterfly nut (guitar tool works)
Oops, forgot to do velcro around plastic ribs...
Method:
General comments: Please position clips or other projections inward, to avoid damaging the roof or sides of canopy. Never put away wet (if it rains at a show, spread out pieces at soon as possible afterwards.) Always weight canopy. If strong winds are projected, double weight it. The spreader bar should be adjusted such that the top is taut. This will prevent pooling in case of overnight rain, which then splashes everywhere when you roll up the sides the next day.
- lay the two long bags along (or just outside if space permits) the sides of the space.
- Remove pieces from bags. Note: if properly packed, each bag should have one ‘side's’ worth of pieces.
- Next you will assemble the square framework.
- Each bag will contain two halves with corners that make up (half) of the front and back; and two pieces with little projecting tubes that make up(that) side; and two legs, which have circle bases and a thinner metal tube at top; ignore the plastic and thinner metal poles for now.
- place a leg at each corner, along sides of space, to get it out of the way
- Place corner pieces such that short leg faces downward to ground, welded piece with the holes in end lays along front (or back) of space.
- There are two pieces that form the sides, with little tubular spikes.
- Arrange the sides so the spikes are closer to middle than the corner, and so spikes point upward.
- Attach U-clips first at corners, then at front and back middles, and finally at side middles. This will require less force than if you try to do the corner—or even a front or back—last!
- Next, insert legs into corners. Small tube should be positioned to the outside of the corner.
- Loop ropes over spikes.
- Now for the plastic and thin metal poles:
- insert bent pvc on spikes; insert middle piece last. Please be careful, you can break off tubes from the side pieces. It's been done.
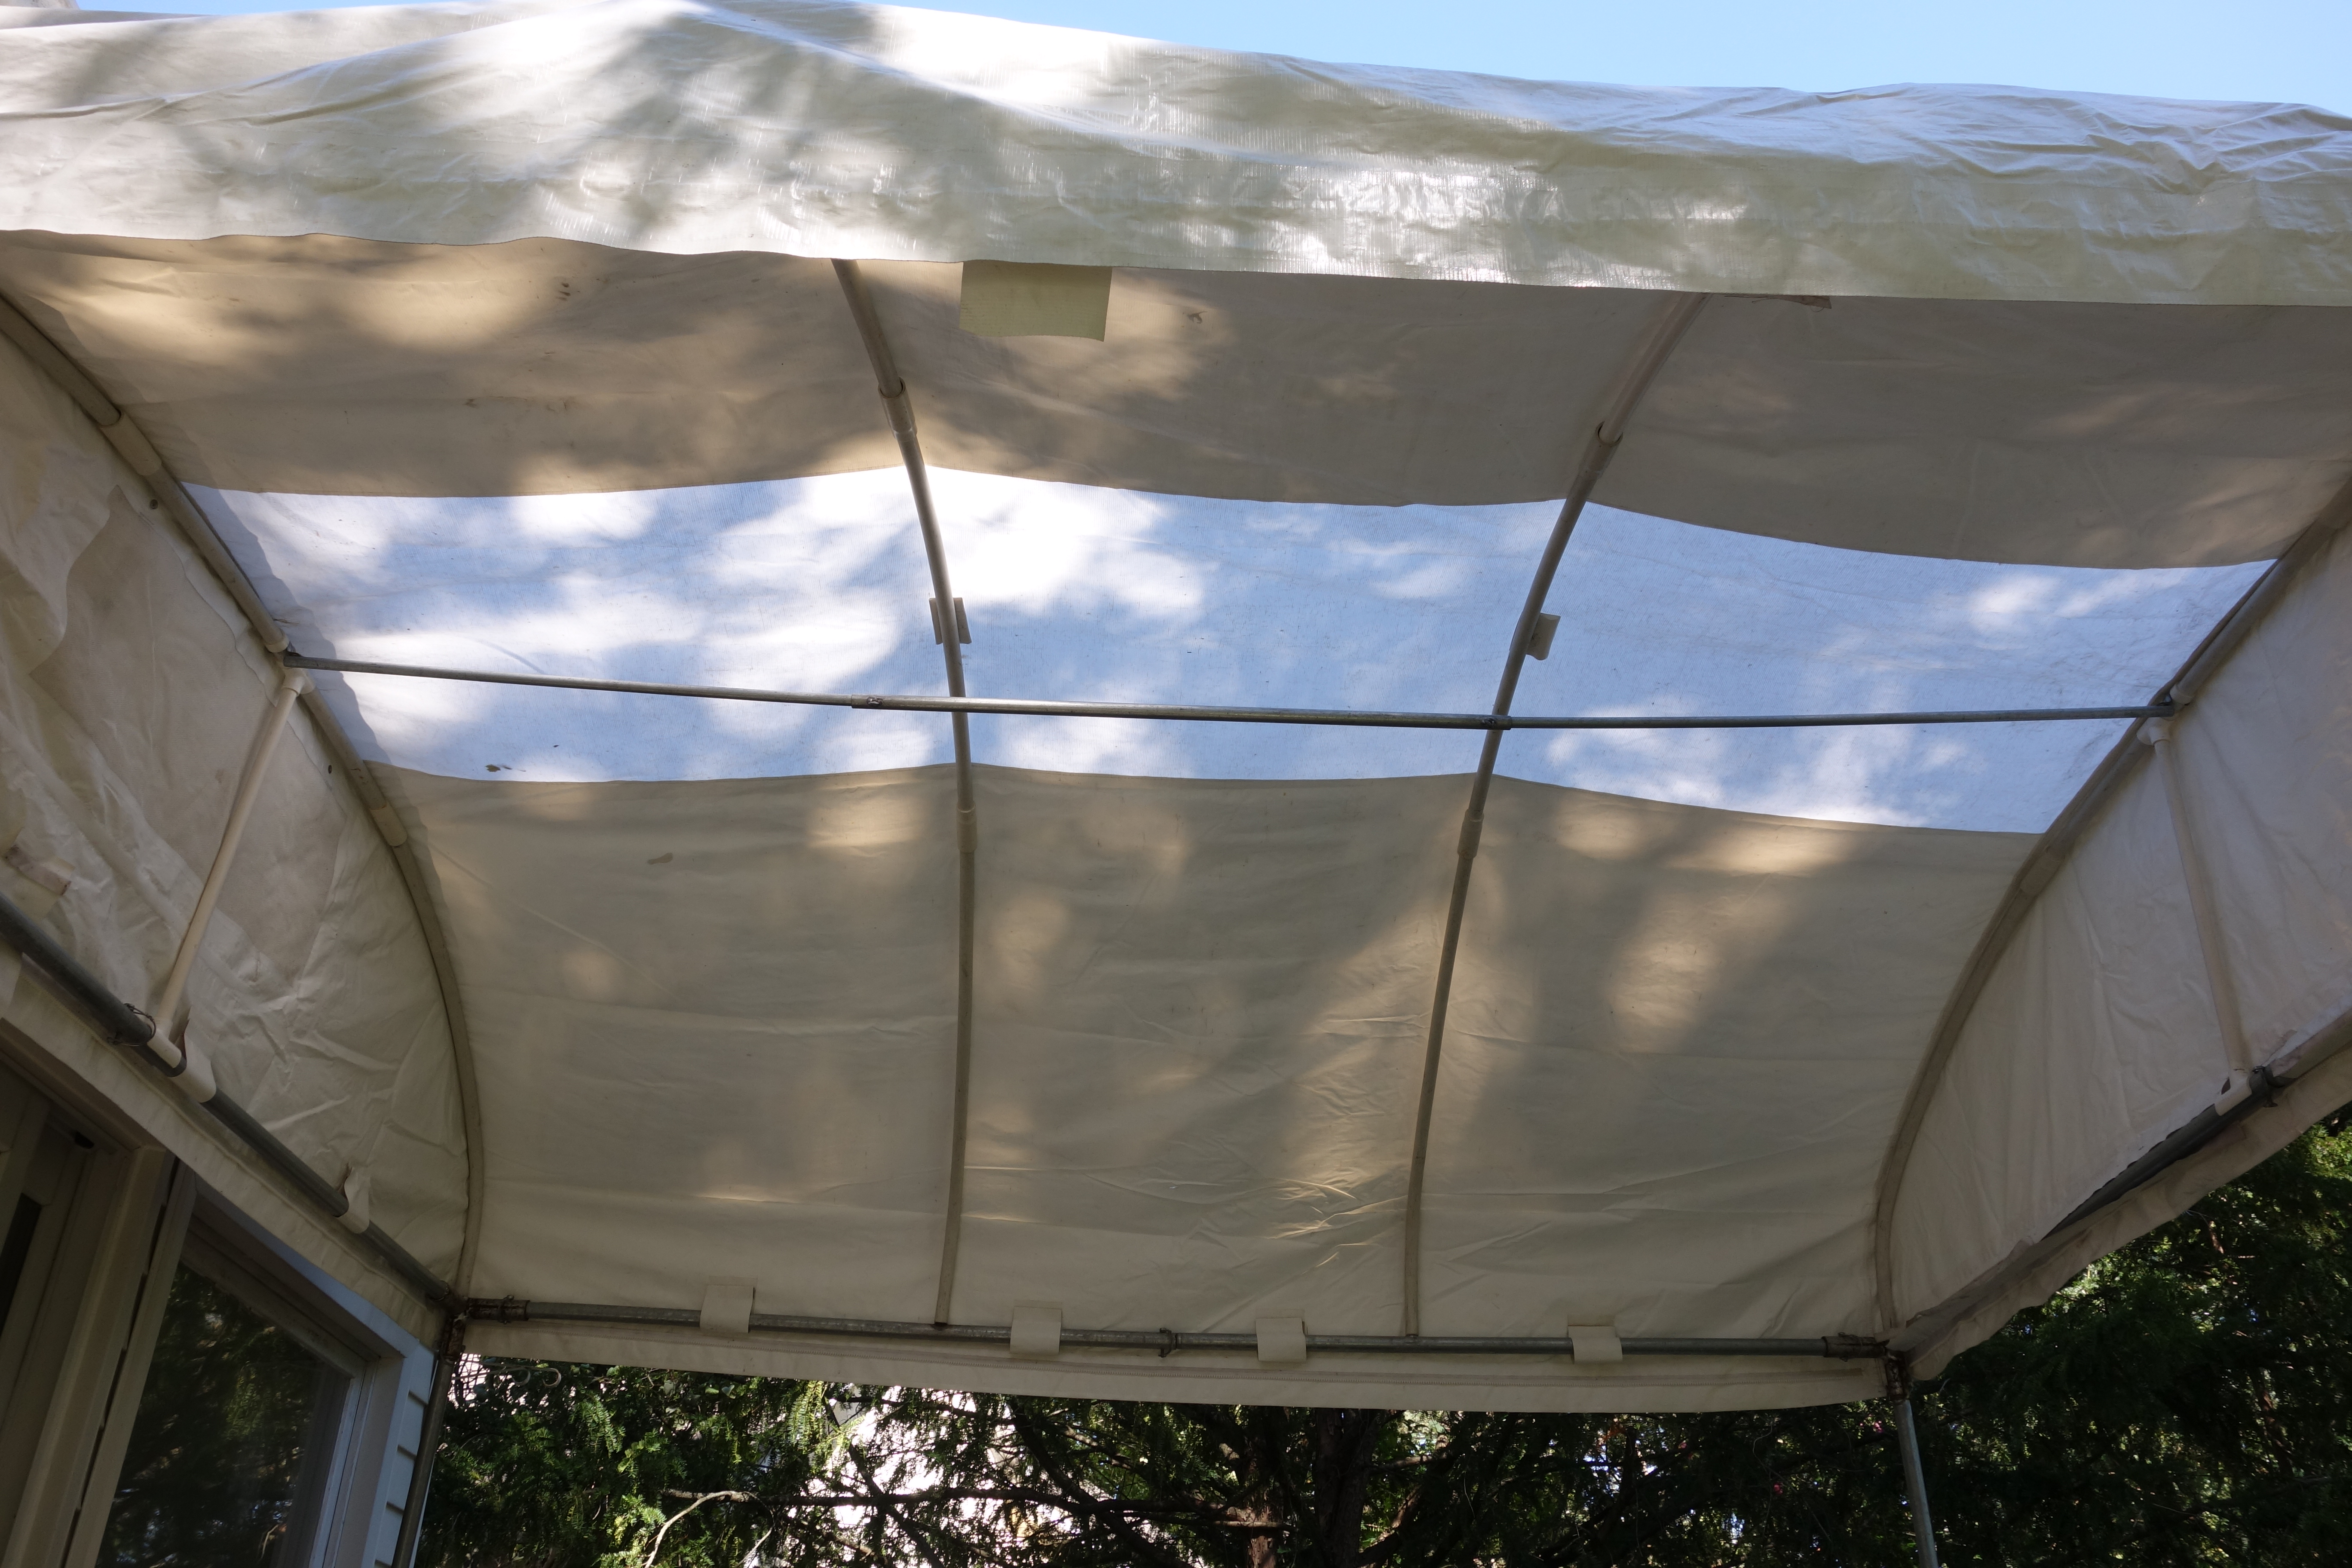
- Attach the vertical spreader bar at each end. This is the weird piece of plastic about 18" or 2’ long. Bottom clips to metal framework, top to the curved pvc rib.
- The horizontal spreader consists of three pieces.
- Clip the ends onto plastic ribs (there's a gap it fits onto) and tighten middle piece enough so it doesn't slide around. (But not so much you crush the tube!!!) It should be adjusted so front and back ribs are even with frame.
- Remove canopy top from square bag. This is your last chance to see if you put on the ropes...
- Partially unfold canopy. The translucent ‘skylight’ runs front to back. The vent goes to the back.
- Loop top over ribs, unfolding and positioning top so it covers top framework.
- Velcro top around poles, not forgetting plastic ribs in center
- Attach sides if desired, and roll up. Note: 3 sides are identical, the 4th is the front, with a door: two vertical zippers that allow the canopy to be almost closed in case of inclement weather. You will also need to make sure the zippers ‘mate’ correctly at the corners (which won't happen if you put one on sideways, inside out, etc.)
- Unclip U-clip at base of legs, raise leg up and reclip at desired height.
- Check to make sure canopy is square and level!!!
- Clip weights to legs; use extra rope to tie weight to leg so it doesn't flop around when people brush into it.
Congratulations, you're done.
If you didn't already, zip sides to top and then to each other at corners when ready to leave for the day (zippers are double sided). If the hole in roof is patched, it should be water-tight.
Good luck!
Unless otherwise noted, text, image and objects depicted therein copyright 1996--present sylvus tarn.