My earliest “wire wrapping” mostly involved twisting those cut-off ends from head pins into little spirals, coils and the like, which I then attached, like the fuzzy coat of a caterpiller to more wire. This made a rather lumpish, but interestingly textured object that is technically a bead.
After a while I actually started to use good wire to make sort of a cage around large, ugly[1] beads, which then served as an armature for more elaborate decorations. I combined a freeform wire-wrapping (though it was a couple of years before I realized this was what I was doing) with beads on wire and some needlelace techniques.
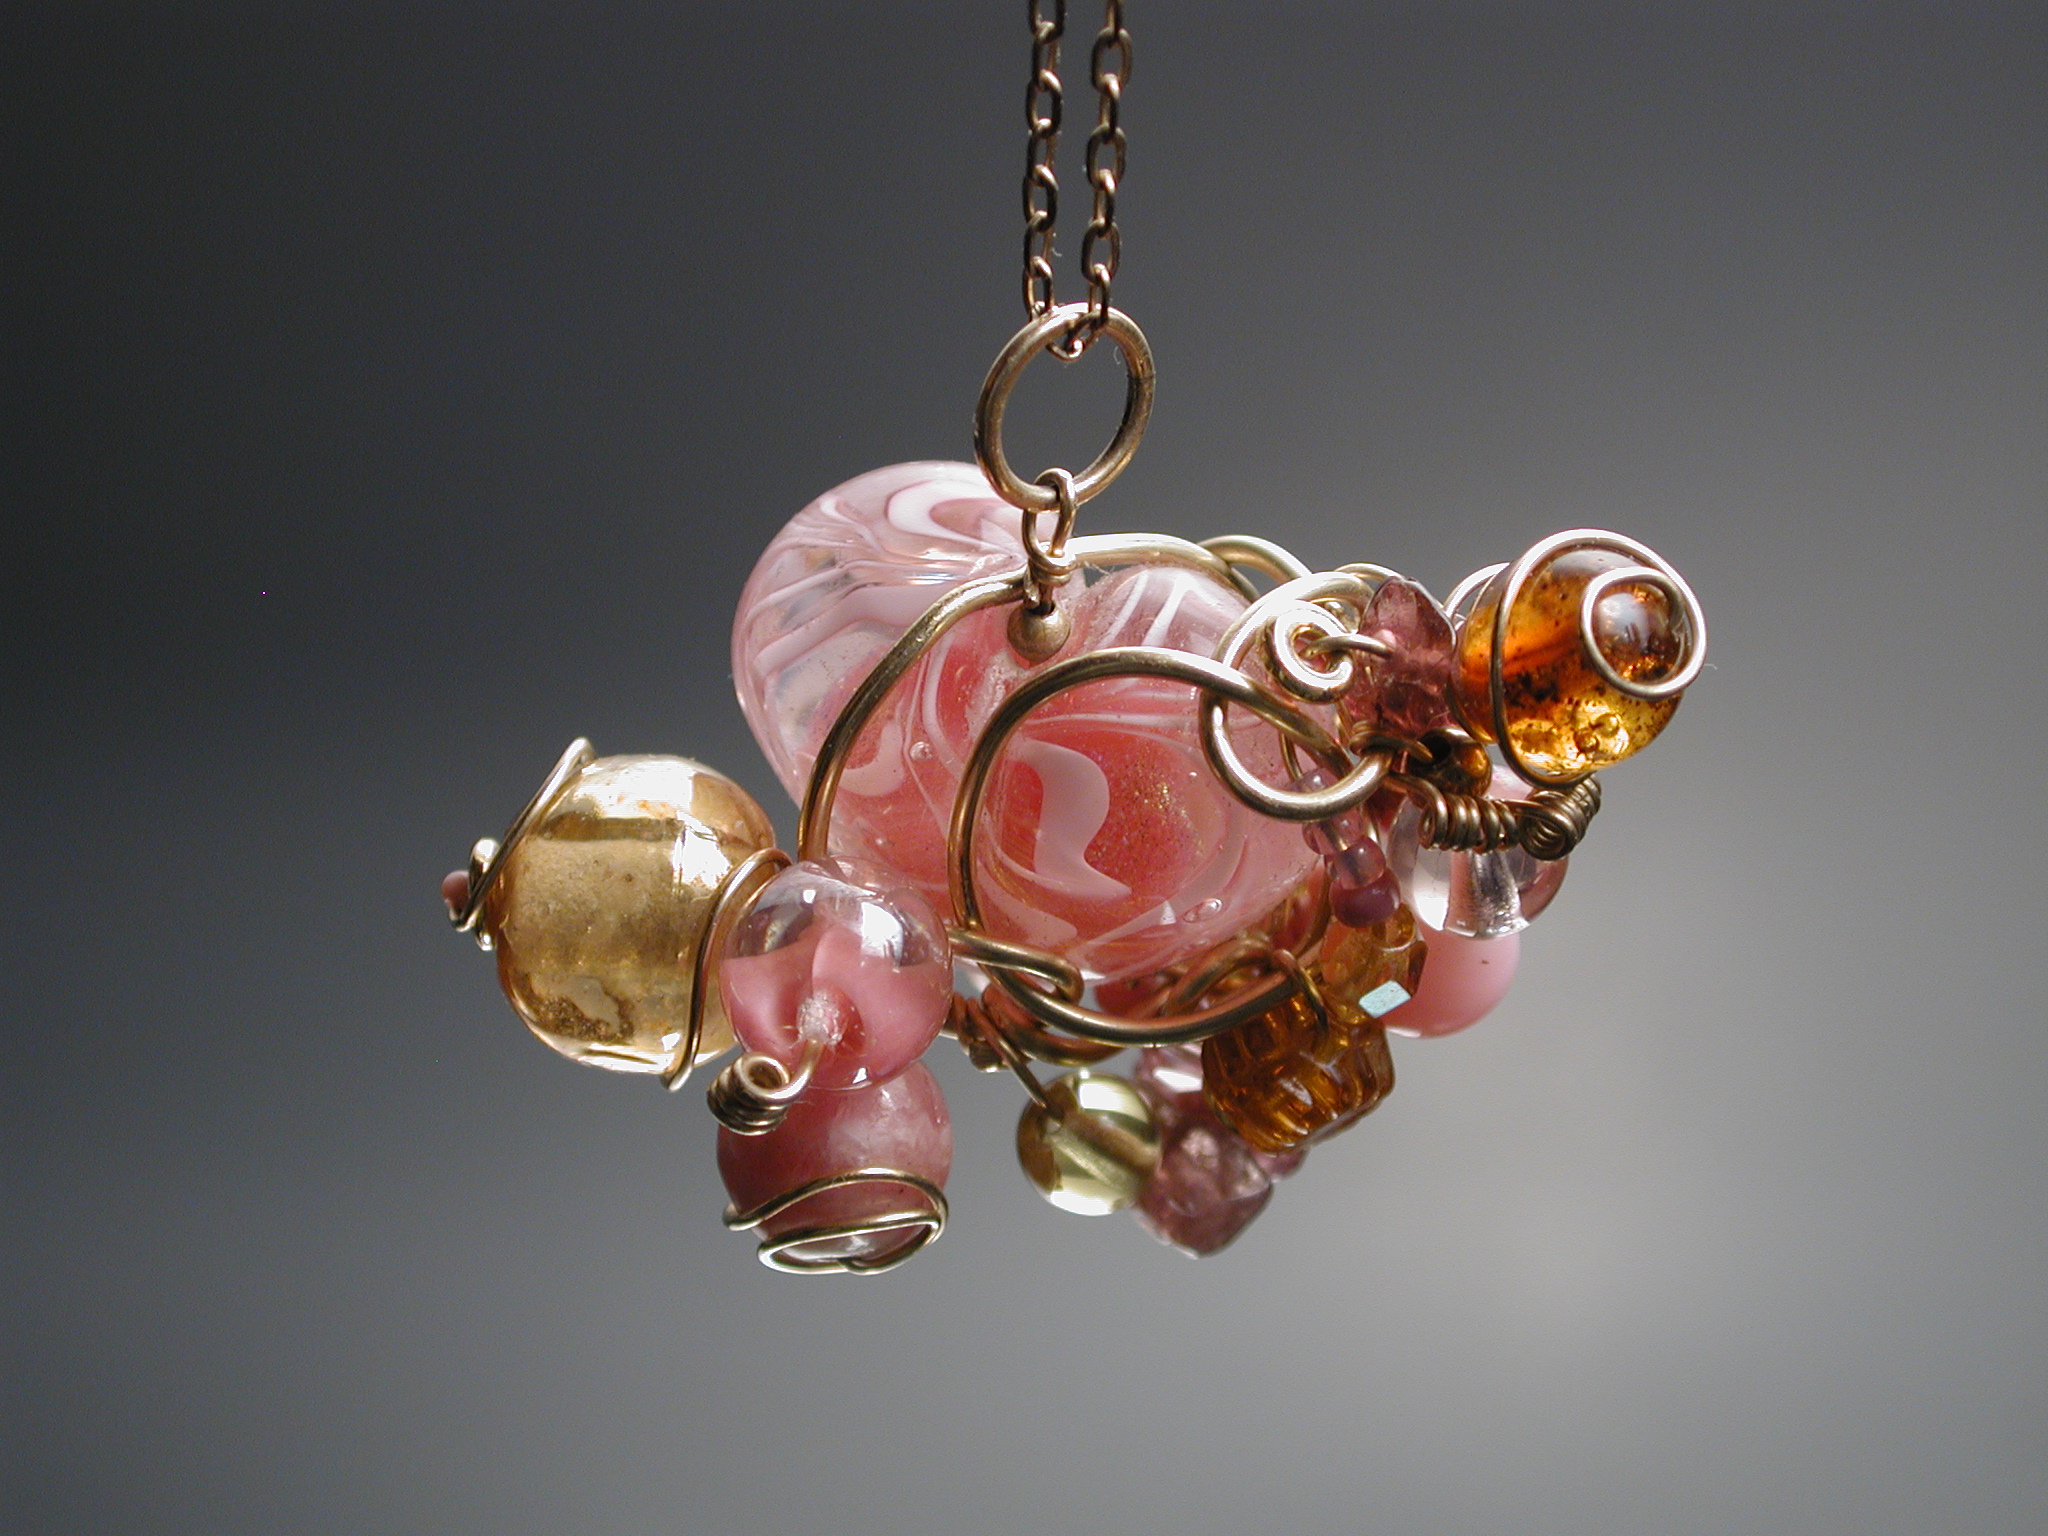
Wire wrapped Peggy Prielozny dichro heart. Shot 14sep2002, nikon990, f3.6, 1/65sec, focal length 19mm. Click on the images for full-size version.
Thus the wire-woven beaded bead was born. This is a great technique for jazzing up boring beads and using badly drilled chips, which obligingly lay in interesting ways when tightly strung on wire.
The procedure may be broken down as follows: choose a large ugly bead or pendant, preferably one with some texture to it. Cut a piece of 14–18 ga wire, perhaps 12–18” (30–45cm) long and make a loop at one end; string the other end of the wire through the loop and draw tight, such that the loop falls half way between the bead's end (hole) and middle (equator). Now bend the wire at an acute angle, like Z, wrap it the opposite direction around the bead. Tuck the end under this second loop, then start “lacing” back and forth between the two loops. The laces can be fanciful and loopy; they don't have to just go back in forth. The idea is for this piece of wire to make a cage around the bead. If parts are too loose one trick is grasp the loose section with chainnose pliers and twist.
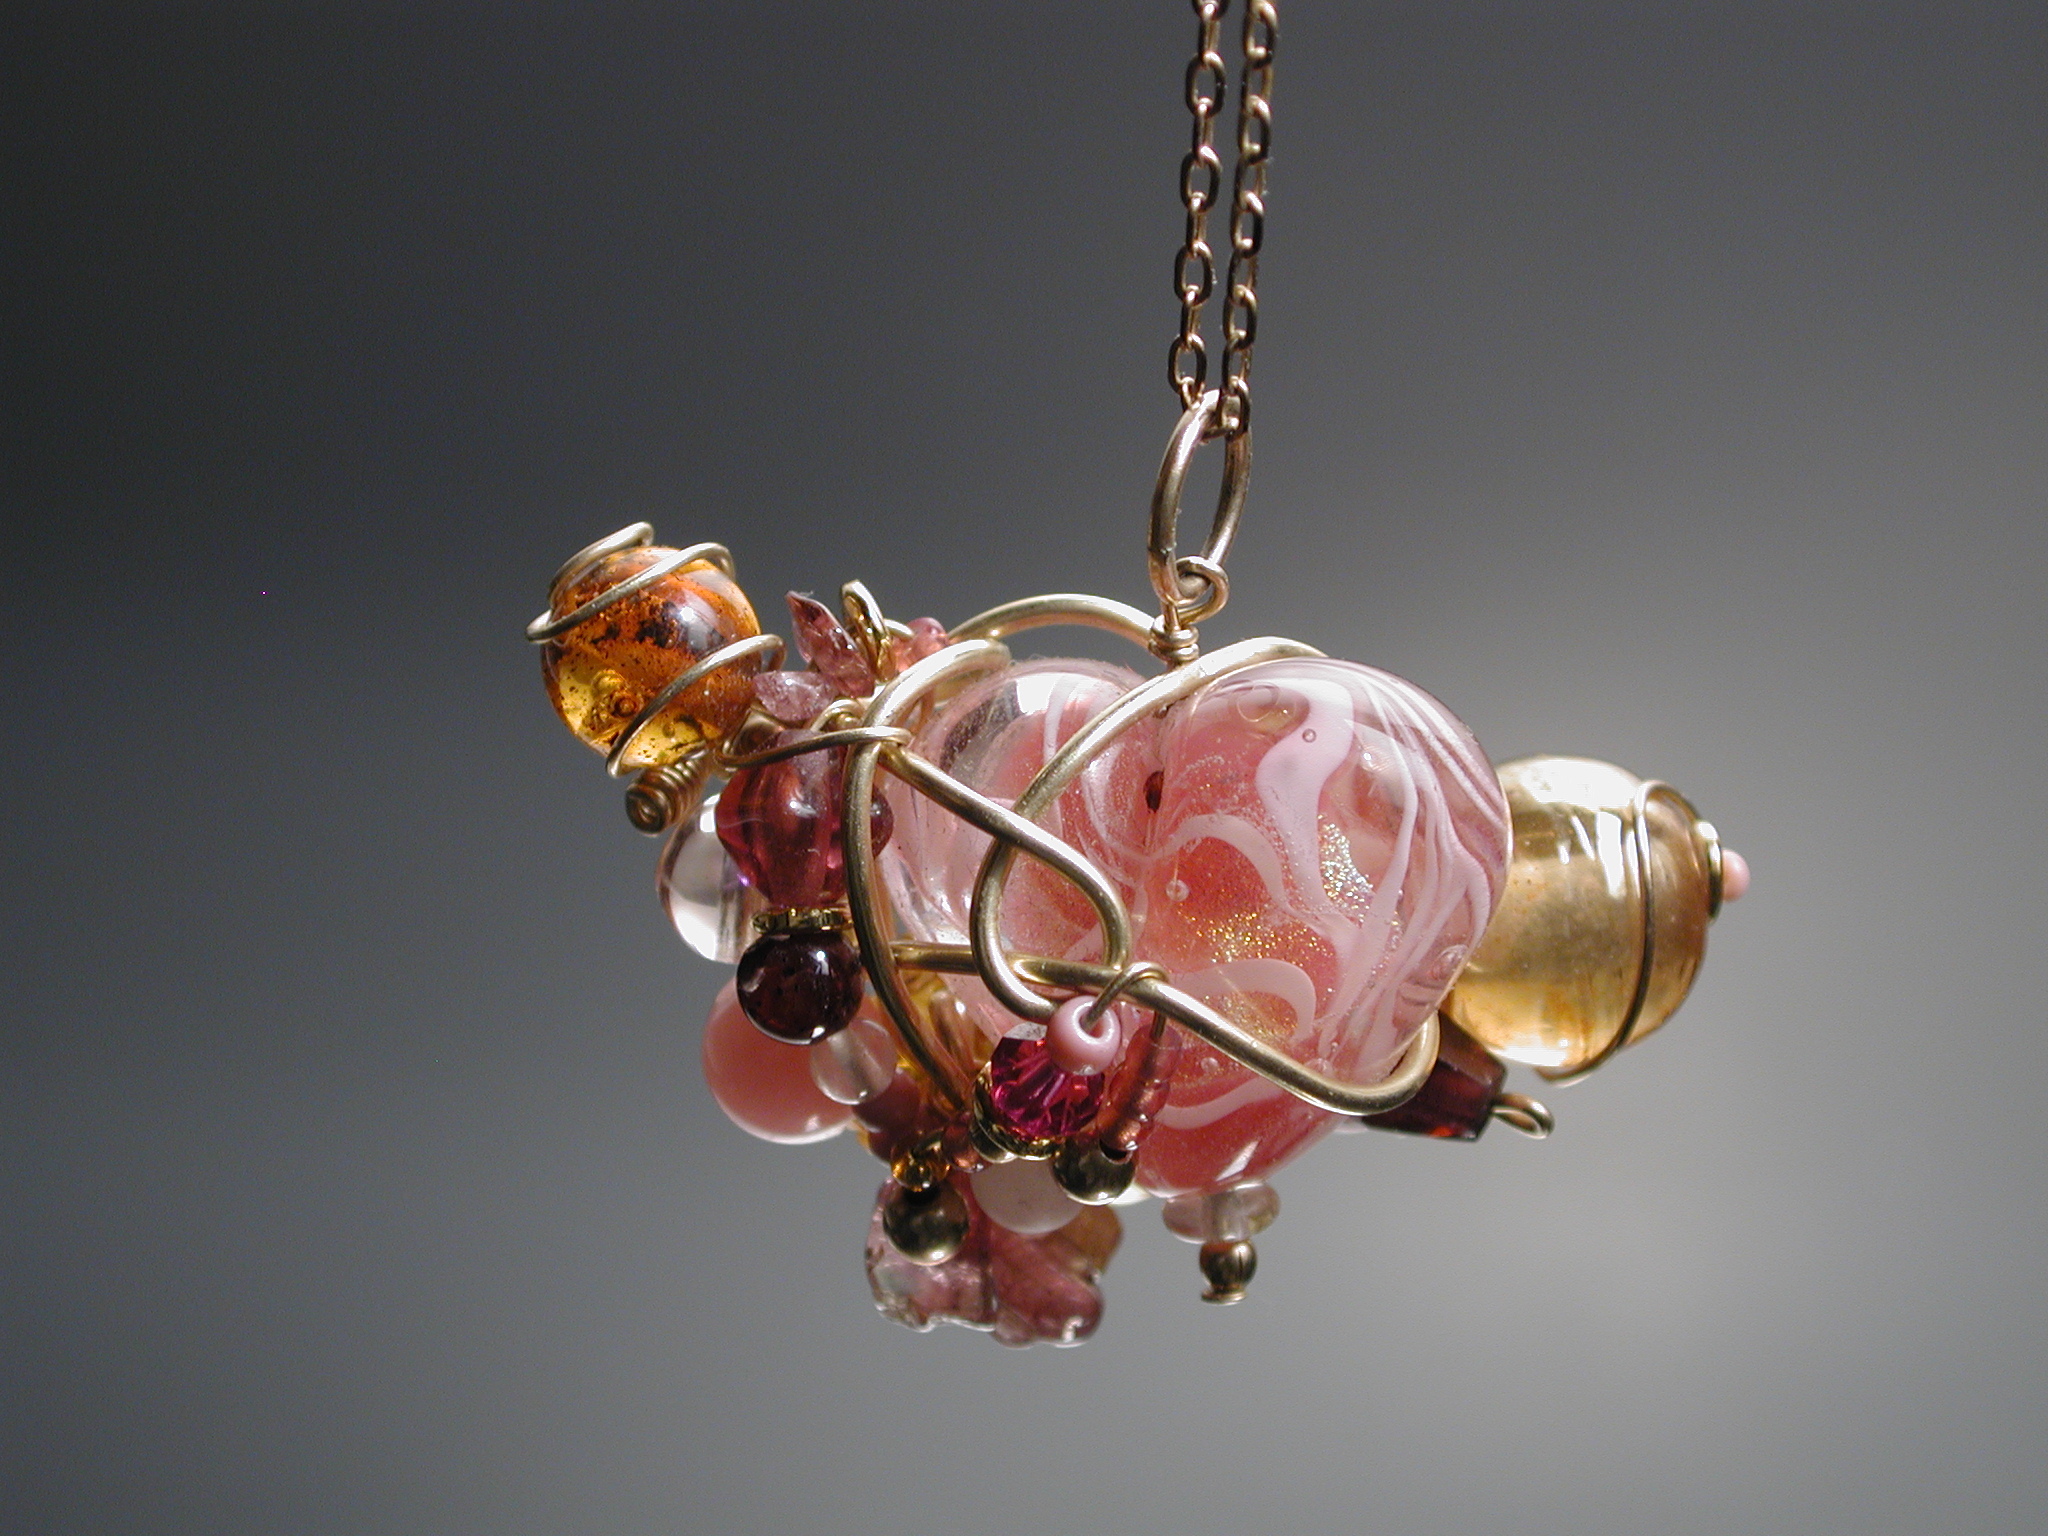
Back side.
Now you are ready to decorate. 24 gauge wire is fairly strong and just about any bead can be threaded upon it. Cut a piece 12–18” or so long, fold in half, slip under an intersection of the cage. Put on some beads and start wrapping and twisting. The wire can make plain loops, clumps of beads, or combinations. When finished with one side, start on the other. Continue till you're happy with the results. Great way to use up odds and ends.
Tricks: start with soft wire; as you get better at keeping your “cages” from springing off your base bead or pendant, use half-hard–it holds its shape better and allows for more shallow curves. Square wire is very pretty. Don't forget to leave parts of the bead uncovered (that old negative space/let the eye rest thing). A fun technique with especially fine (28-30 ga) wire is netting. Use fine silver; it stays soft longer. Don't hesitate to use fine chainnose pliers (lindstrom brand for example) to help you fish the wire through tight spaces. I like to finish off wire ends either by twisting them into teeny tiny coils or by placing a 6–10mm decorative bead perpendicular to substrate, coming out the top (hole) and spiraling along the bead until I get to the bottom and winding tightly about the base.
Though I wrote the above quite awhile ago, and the pieces depicted below are all several years old, I've just now actually gotten around to photographing them and writing the pages. 15sep02
08apr08, archived the index for this stuff from wirewrap to wirewrap_old. (File names for individual posts remain the same).
update: Tracked down original images, added exif data to captions, 15nov15; added footnote, hearts & dichro tags, 27jun23.
[1]Not that Peggy's beads are ever ugly; this one was cracked, and thus the wirewrapping serves to hold it together & hide the flaw
Unless otherwise noted, text, image and objects depicted therein copyright 1996--present sylvus tarn.