Since I'm not trying to copy anything—marble, malachite, woodgrain, even cracked and crumbling plaster (we have that for real—no faux needed!) my approach for painting walls using multiple layers and a lambswool roller is not, strictly speaking ‘faux painting’. But that's what people typically categorize these fancy techniques under, so that's what I call it.

First pass: later, I decided I wanted mostly a green room—note that there is no green at all in this layer.
This was the first room I painted using this technique, so it was a learning experience. Having never really indulged my homedec urges before, I took this opportunity to try anything that looked interesting.
After removing the wallpaper, I primed the drywall. Because so much of the rest of the house had oil paint and lord knows what else, not to mention raw wood, I sprang for expensive primer guaranteed to go on just about everything—a Behr product in a big white and purple 5 gallon tub. But any primer would've been fine for drywall, which is far more forgiving than, say, raw wood or old oil paint, two other surfaces I encountered frequently.

The north and east-facing walls, now primed.
Although originally I got little quart cans of colors I thought I'd like—pale green, lilac, pink—it soon dawned on me that what I really wanted was the latex analog of my artist's acrylics, which I've used to paint things like chairs. Back to the DIY, this time to get the closest thing to saturated colors they'd sell me. The guy even let me look at the resevoirs, and I selected the following:
- fuscia (essential for true purples)
- red
- dark yellow
- pthalo (dark blue) green
- cobalt/ultramarine blue
- dark brown
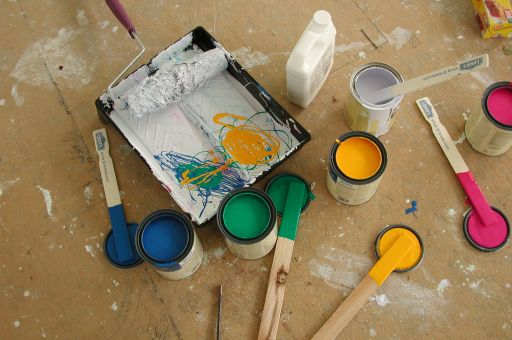
The saturated colors. The white plastic container is possibly a metallic, or perhaps glaze; off to the right you can see a can of lilac, purchased before I started mixing on my own. I just threw it in with everything else. The paint stirrers doubled as dispensing tools to drizzle paint into the tray.
He then dispensed the most saturated version of each the machine would let him into quart cans I used whatever white or cream paint lying around as the base. The former owners left us all this half-broken stuff, but two things proved handy—miscellaneous cans of paints and a large wooden cutting board on rubber feet.
Of all the colors, brown was probably the least useful, as it's easy to mix up. If you are not familiar with the characteristics of artists’ colors, allow me to sum up: red, yellow and blue are the so-called primary colors, from which all others theoretically can be mixed. Equal portions of any pair (e.g. red and yellow) make a secondary color (e.g. orange—except, you use 3–5x as much yellow as red...) Practically, however, red and blue make a rather dull puce; for nice purples, you need fuscia to mix with your blue, and there is no way to get good pinks without it. Ditto for yellow and blue—they make a nice avocado, but if you want true greens, pthalo green, mixed with yellow as needed, is your friend.
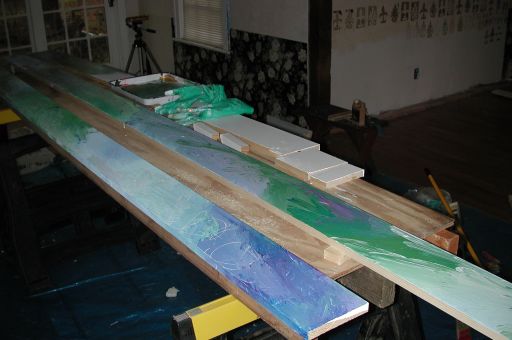
In progress.
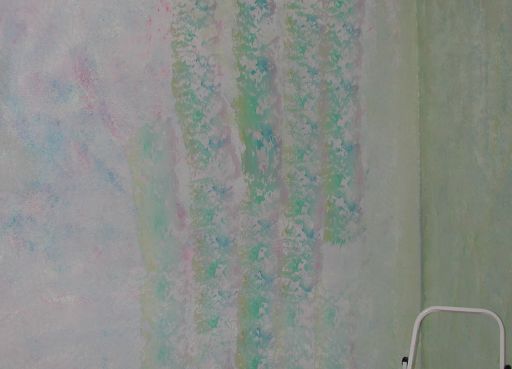
You can see some pretty vivid color, freshly applied. Obviously, it will need to be ‘taken down’ —overpainted with much less saturated mixes, so that just flecks of the original, brighter color show here and there. Or, sometimes, I mixed right on the wall, overpainting with more wet paint. The possibilities are endless if you don't worry about failing: it's only paint—very easy to cover up!
As you can see, paint is mostly a matter of white with just a bit of color. I initially tried various tools for applying color—a ‘seasponge’ roller, and a foam roller with a wave pattern—but soon discovered I preferred a lambswool roller with 1-1/2” (4cm) long fleece. This came in a ‘faux painting’ kit with a split tray, which I quickly dispensed with. The break in the roller to accommodate the silly tray is actually something I had to work around, but the lambswool itself worked great. I was scrupulous about cleaning it, and it's repaid me with great service. A little lambswool puff on a stick serves for corners and other tight areas. (Okay, I cheated a bit on this room, sometimes hand-applying bits of color with the puff. But by the time I got to the living room and kitchen I was applying with the roller only, excepting corners or other places it didn't reach.)
I can use this roller not only to apply paint, but also, after it's tacky, to remove paint (which I did also). I also added the latex paint equivalent of matte artist's medium—I believe it's called glaze—a transparent medium that thins the opacity of the paint without reducing its viscosity, which allows one color to show through another, though as I recall I added this to my bag of tricks after I'd mostly finished with the studio.
I probably put 20 (partial) coats on the studio walls, a process that took perhaps double the time standard painting would've and no more, (and probably quite a bit less) I'm convinced, that the careful approaches my sister and sister-in-law used, scrupulously following directions in books with newspaper (ragging off) and plastic wrap. However, my approach requires a little more operator input. —I did use newspapers on occasion to desaturate the roller if necessary.
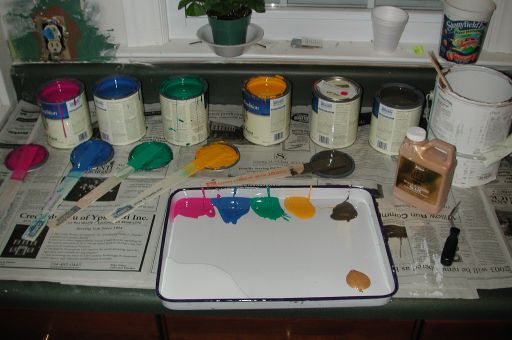
Paints laid out, ready to go.
For the window trim, I used my chair-painting approach: instead of a roller and tray, I used my acrylic pan (an enameled dissecting pan) and fingers (protected with rubber gloves) to apply the paint. I've added metallics to the mix.
trim, painted
This house is old enough to have old fashioned 6” (15cm) mop boards, which would have protected the old-fashioned, honest to goodness wall*paper* from (you guessed it) wet mops. So we made something similar to go in the studio after the flooring was in. I also removed the corner trim (painted green in the original photo on the boards framing the windows) because I thought it was badly proportioned and too busy—I liked the look of the flat boards better, which I dressed up a little with square blocks at the corner. But never fear, the corner trim will be making its reappearance with my hood. Suitably painted, of course:)
Return to the wallpaper removal tips or new studio page or main studio page or go on to the ventilation page.
Unless otherwise noted, text, image and objects depicted therein copyright 1996--present sylvus tarn.