All those books and articles always make these projects so easy—just do a, b, and c, and you're all set. But, inevitably, there are problems. Lots of them. Coping with difficulties is not so much obstacles to get around, as almost, it sometimes seems to me, the point. So here are some of my wallpaper strategies.

The scapers are fifth, fourth and third from the right. The rest are my mudding tools.
I didn't actually buy all that much stuff to apply paint, but I bought every tool I could find for removing wallpaper—this house was covered with the stuff, and aside from Victorian era roses on a red background in the dining room that elicited a squeal of delight when Page & I first saw the house, it all had to go. My horror stories are fairly mild—4 layers, two interleaved with paint in the kitchen, and wretched prep in the studio. You may as well stand to gain from my pain.
One. Those paper tiger things are worthless. Save your money. Slice the paper with a razor—gently!—if you need to get water to penetrate. Quite often water, or wallpaper dissolver, will eventually soak thru even modern wallcoverings.
(An aside: Authentic wall paper, as for the bottom two layers in the kitchen, is actually fairly easy to remove, but it hasn't the water resistance and durability of modern wall coverings. The roses mentioned above, as far as I could determine from my researches, do indeed date from the Victorian era, even though the house doesn't, but the actual covering was made with modern pigments and substrate.
Unlike most modern printing of any kind, which is flat aggregations of tiny dots of ink, this paper was surface printed, with one pass for each of the eight colors, plus background. Similar wallcoverings boasted of being printed from the original metal rollers individually cut for each pattern. There are modern updates to the process, which, as it reminds me of the hand made silk-screen cards my mom and I used to make, is worlds more attractive than the offset printed stuff. Though by no means the upper end at $35 or so for a double roll—wallpaper can cost up to $200 a roll—this paper isn't something you'd find at Home Depot. I was thrilled to find it still in production, and used it in other colorways elsewhere throughout the house to tie the decor together.)
Two. Buy lots of good sharp blades, and plan on changing them every 45 minutes of consistant labor. (Bonus: removing wallpaper and scrubbing walls is excellent exercise. I went down to single layers—as opposed to the typical 4 layers I wear during the winter— with the thermostat turned to 55 and that's cold in a house this drafty, eating Japanese junk food all the while. And still lost weight.)
Three. If you have more than a room to do, buy that blue goop for removing wallpaper in gallon containers and apply it with a sponge mop. Repeatedly if necessary (and it probably will be. Removing wallpaper is definitely an iterative task: only the stuff in the basement stairwell came off with a single, satisfying rip. So plan on wetting and razoring. Over and over and over.) I used three kinds of scrapers, all of which are shown in the tool picture. The big wallpaper scraper was probably my favorite for paper, though it was a toss up between it and the carbide tool for paint. The cheapie window scraper is nice for tight areas.
Four. Buy a good quality drop cloth. It's much less of a slip and fall hazard. You will never go back to plastic, and it absorbs the water that will be dripping everywhere as well as the paint you'll be applying later.
Now, the one thing I didn't try that the wallpaper shops recommended was renting a steamer. If I had to do over again, I'd try it; I've heard mixed reviews on its effectiveness, so that's all I can contribute on that topic.
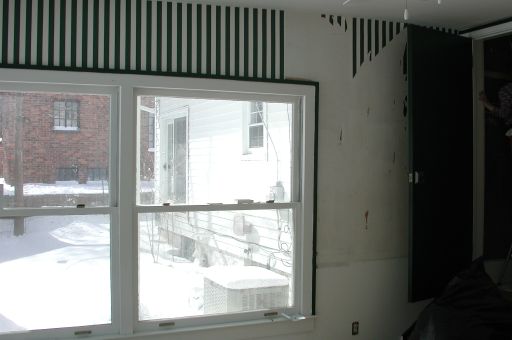
This is the south facing wall. The wallpaper is starting to come off, but not without a fight.
Okay: so removing wallpaper in the kitchen, which was properly painted and sealed, just took a lot of effort. No such luck in the studio. Most of the house is traditional three-coat plaster—lovely stuff. The studio walls, being part of a more recent addition, were sheathed with 3/8” sheetrock. The standard is 1/2”; and I prefer 5/8” fire-rated drywall: it's more rigid, thus resistant to dents, bowing etc, it (like genuine plaster) seals out more outdoor noise) and it's safer besides. (The downsides is that it's heavier and sometimes—but not always—costs more.)
The walls were haphazardly primed with a single coat of paint and not sealed nor sized. Moreover, the wallpaper hanger (as I understand many pros now do) didn't soak the paper to use the pre-pasted glue; instead, s/he just rollered a layer of separately purchased glue. This is supposed to be faster and less messy. But it also ruins the strippability. (Evidently a lot of people, like the former owner, think everyone who comes after them will love their taste—or figure since they won't be taking it down, don't give a rat's ass.)
So, despite a great deal of care and effort on my part, I ruined the paper on the drywall: because it wasn't primed and sealed properly, the water damaged it, particularly the paper. Despite repeated efforts to repair it with mud so as to provide the next person with a good, flat paintable surface, it blistered and bubbled, and finally, I gave up. The next owner will either have to do a busy surface, as I've done, or rip out the drywall and replace it—or they can put in more badly applied wallpaper, I suppose...
Return to main studio page, new studio construction overview or go on to the faux (no) painting techniques or ventilation pages.
Unless otherwise noted, text, image and objects depicted therein copyright 1996--present sylvus tarn.